

Gresham Tree Service Guide: Trusted Local Options for Removal, Pruning and Emergency Care
After a windstorm or when a large tree threatens your roof, finding reliable gresham tree service feels urgent. This guide shows you when to call a pro, what Gresham permits and costs to expect, and how emergency crews, pruning, stump grinding, and routine maintenance should be evaluated so you can hire the right local team with confidence.
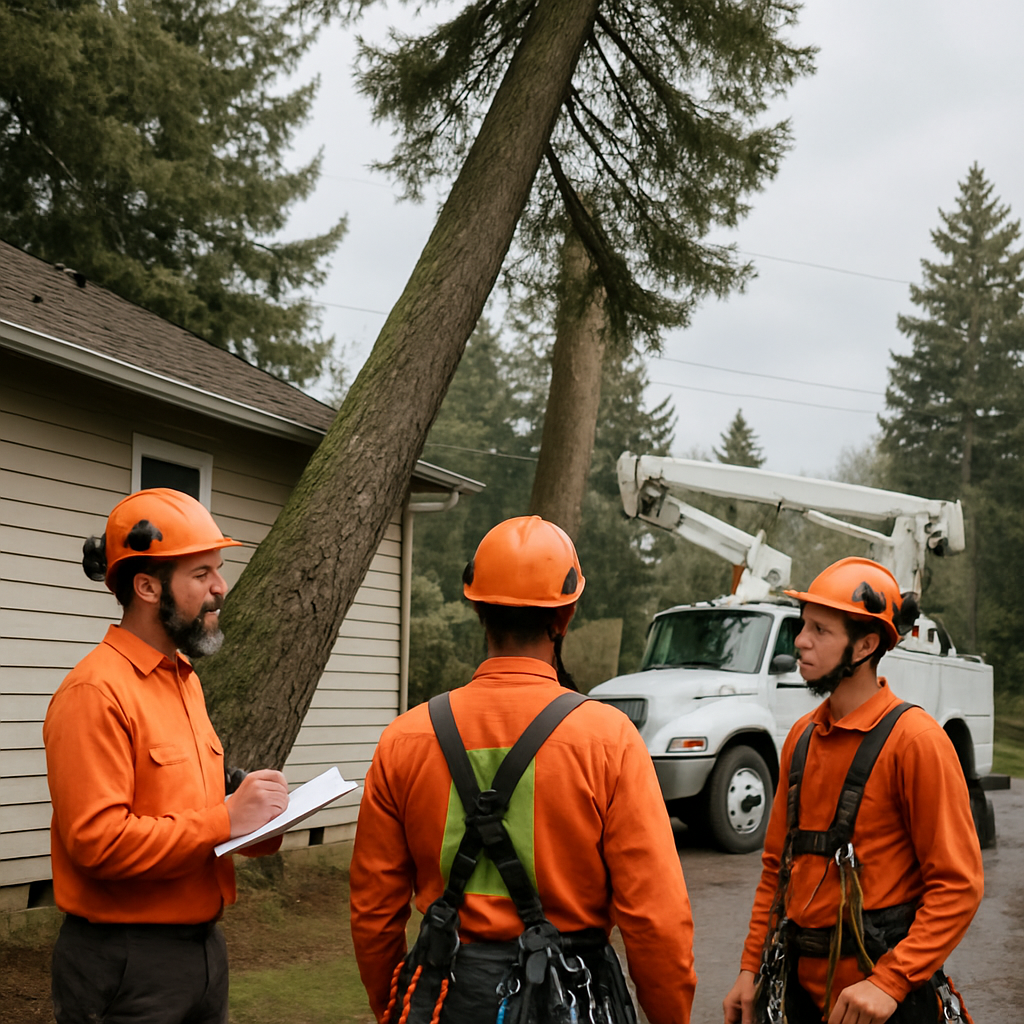
Gresham tree care landscape and how to decide when to call a professional
Gresham’s tree decisions are practical, not theoretical. What matters is species, size, position relative to structures and power lines, and whether the tree is actively failing right now.
Local species and practical consequences
Douglas fir, bigleaf maple, Oregon white oak and red alder dominate yards and street-rows here. Douglas firs can reach heights and weights that change the removal method; they rarely respond well to heavy crown reduction. Bigleaf maple often splits at included bark unions after wet winters. Species choice shifts the risk profile and the right technique—pruning timing, wound-size tolerances, and whether a crane or aerial lift is required.
- Call a pro now: large leaning tree with exposed roots, trunk cracks or split crotches, trees touching or threatening power lines, trees that have fallen on structures, visible root heave by foundations.
- Book an arborist inspection: repeated branch failure, progressive canopy decline, fungal fruiting bodies at the base, or suspected pest/disease problems.
- DIY safe work: small dead lateral branches under 2 inches diameter, away from power lines and more than 8 feet off the ground, using appropriate hand tools and ladder safety.
Decision framework: If there is immediate risk to people, property, or utilities, treat it as an emergency and call a qualified crew. If the tree shows structural defects without imminent failure, get a certified arborist for a tree health assessment and a prioritized work plan. For routine maintenance, schedule pruning in the correct season and insist on ISA-compliant pruning methods.
Concrete examples: A 60-foot Douglas fir that pulled away from its root plate after saturated soil and now leans toward a garage needs professional emergency stabilization and likely removal; this is not a DIY job. A large bigleaf maple with a visible vertical crack running halfway up the trunk should get an arborist evaluation within 24–48 hours to assess failure risk and insurance documentation. Conversely, removing a single, small dead lateral limb that is reachable without a chainsaw can be handled by a competent homeowner.
Real-world trade-off: Hiring a pro costs more up front but reduces liability, avoids botched cuts that shorten a tree’s life, and ensures permits and utility coordination when required. Cheap crews without insurance or poor rigging increase downstream costs — property damage, incomplete cleanups, or denied insurance claims.
Practical next step: If you suspect a permit or utility coordination is required, check the City of Gresham rules and call a licensed contractor who handles permitting and emergency work. See City of Gresham tree resources and compare scope with a local provider like Mr. Tree Inc. services or their emergency tree services. For pruning standards consult the ISA and species guidance at Oregon State University Extension.
Emergency tree services in Gresham: immediate homeowner actions and what to expect from a pro
When a tree failure threatens people, structures, or utilities, immediate homeowner actions shape safety and insurance outcomes. Secure the scene, gather evidence, and avoid any intervention that could make the hazard worse.
Immediate homeowner checklist
- Secure the area: Keep people and pets at a safe distance; use tape or temporary barriers if available.
- Do not touch downed lines: If the tree contacts electrical service, treat all wires as live and call your utility immediately.
- Photograph before moving anything: Photos are critical for insurance claims and for the contractor to triage remotely.
- Call 911 for life-safety threats: If someone is injured or trapped, emergency services must arrive first.
- Notify your insurer and document communications: Report obvious structural damage and save claim numbers.
- Contact a licensed emergency crew: Use a contractor who provides written scope, proof of insurance, and utility coordination. See Emergency Tree Services – Mr. Tree Inc..
- Do not attempt major cuts yourself: Amateur cutting often worsens structural failure and causes liability.
What a professional emergency crew will do on arrival
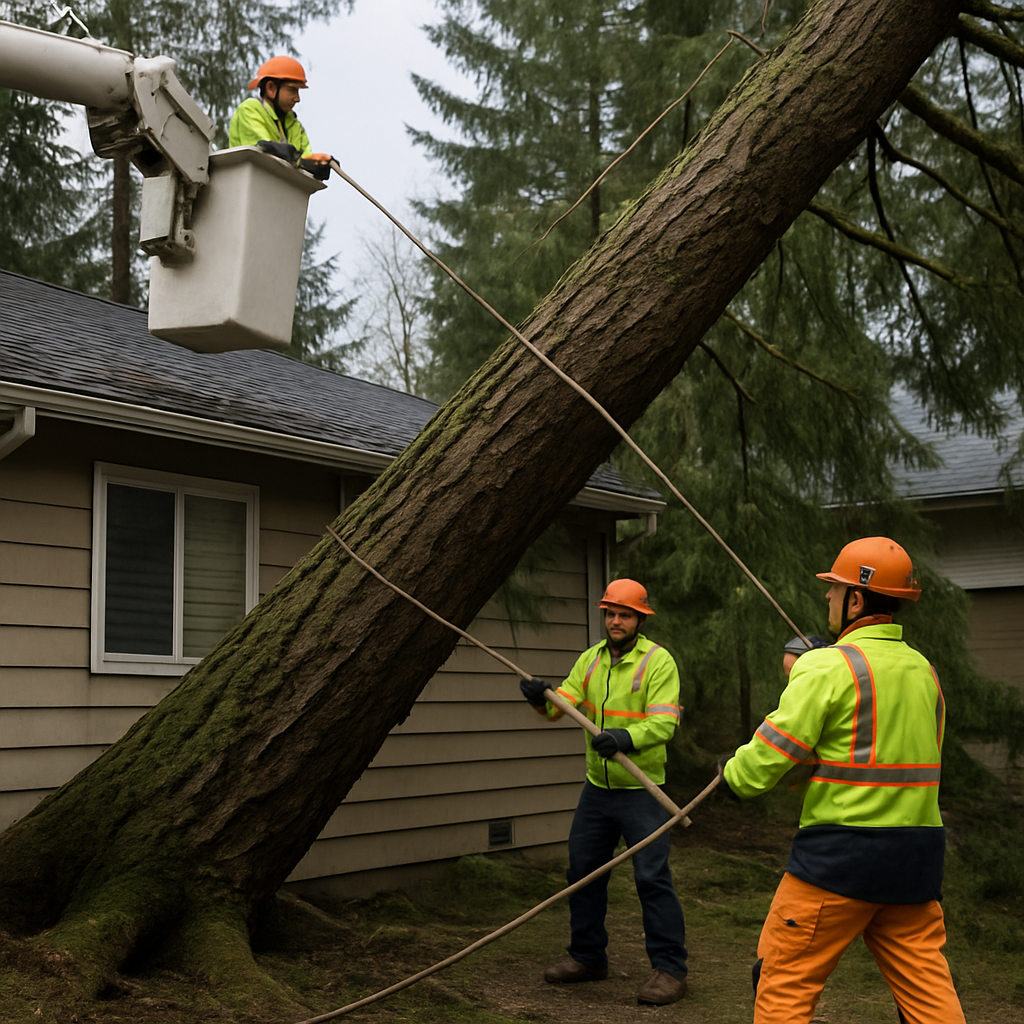
Rapid hazard triage: A qualified crew will first identify immediate collapse zones, pathways for falling limbs, and unstable root plates. They will mark no-go areas and set up rope systems or a bucket truck if needed.
Stabilize before remove is a tradeoff: Emergency work focuses on removing imminent risk, not cosmetics. That can mean large temporary cuts or sectional removal that makes the site safe quickly but leaves the tree in a non-final state. Expect a follow-up visit for full removal or aesthetic pruning.
- Utility coordination: Crews will contact the power company to de-energize lines when required. Utility intervention may be the gating factor for safe removal.
- Controlled rigging and drop zones: To protect structures crews use rigging, lowering lines, and chipping to manage debris.
- Documentation: Crews provide damage logs, before-and-after photos, and disposal receipts for insurance.
Practical limitation to plan for: Emergency response is not always immediate. During major storms demand spikes and crews prioritize threats to life and critical infrastructure. Have realistic expectations about timing and a contingency plan for temporary tarps or boarding if your roof is compromised.
Concrete example: A large cottonwood fell onto a detached garage and left the service drop entangled in branches. The homeowner called the utility and then an emergency contractor. The crew stabilized the tree, had the utility de-energize the line, removed the weight off the roof in sections, and staged debris for insurance review. Cosmetic cleanup and stump work were scheduled later.
Do not attempt to free branches from power lines. Always call the utility first and wait for a qualified crew.
Tree removal in Gresham: permits, process, cost drivers and timeline
Key point: Permits, access and rigging plans usually determine how long a removal takes and how much it costs – not species alone. In Gresham, a straightforward backyard removal can be done in a day; anything near a house, street, or environmental overlay becomes a project with approvals, specialized equipment and safety controls.
Permit triggers in Gresham
Know before you book: The City of Gresham requires permits or approvals for certain trees, especially those in protected zones, on public rights of way, or within environmental overlay areas. Check the City of Gresham rules and confirm whether a permit or tree mitigation plan is needed before work starts using City of Gresham. In practice, hiring a contractor who handles permit paperwork saves time and prevents stop work orders.
Typical removal process and trade offs
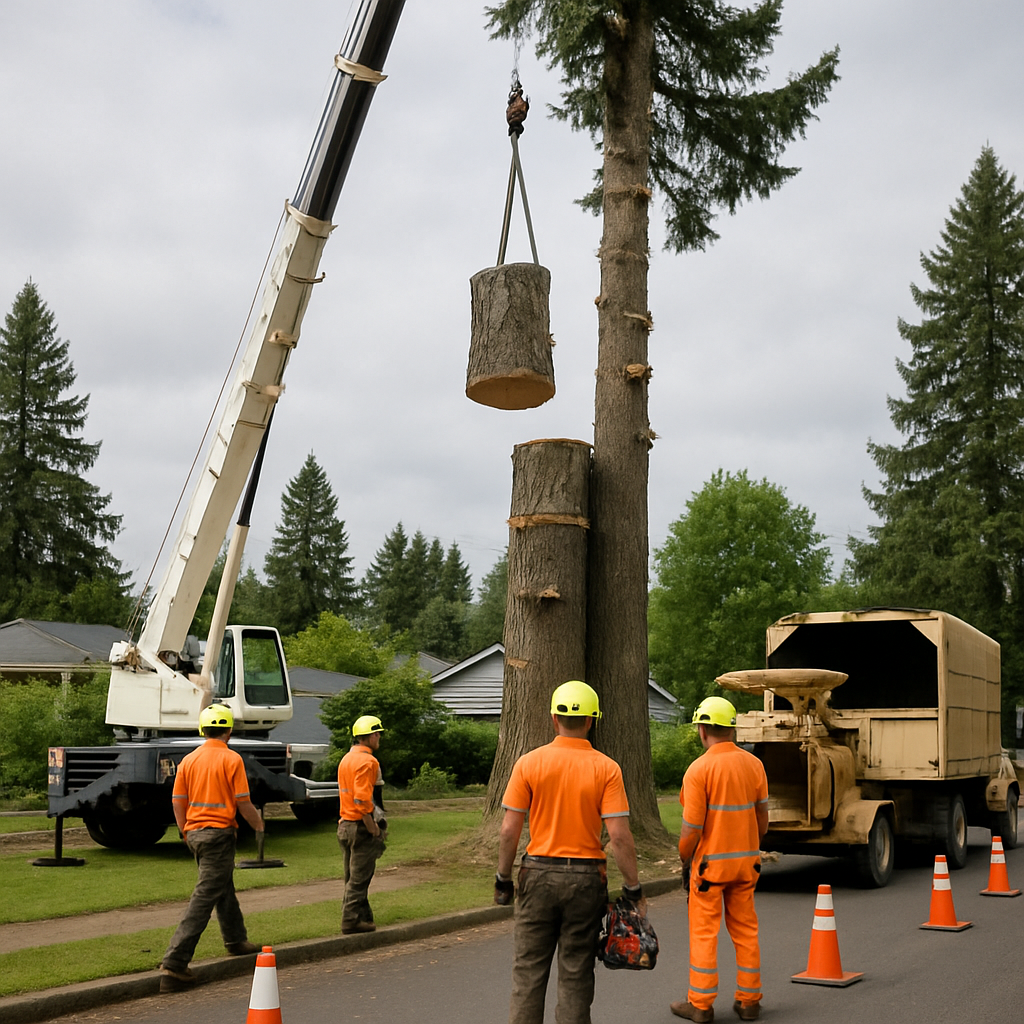
Standard workflow: Site assessment and written estimate, permit and utility locate (call 811), rigging plan near structures or lines, sectional removal or crane operation, stump handling, and final cleanup and disposal. Each step has trade offs – for example a crane shortens on site time and reduces climbing risk but raises mobilization cost and needs clear access.
- Access and rigging: Tight yards force sectional removals that take longer and cost more in labor.
- Proximity to utilities and structures: Work near power lines requires coordinating with the utility and sometimes special insurers or a certified arborist signature.
- Tree size and condition: Diameter and height drive labor and time; decayed wood increases risk and can double the labor.
- Disposal and stump work: Hauling and stump grinding are frequent add ons that shift a low-cost job into a mid-range invoice.
- Permits and reports: If the job needs approval or an arborist report, plan for extra fees and calendar lead time.
Cost context: Small yard trees often fall in the low hundreds to low thousands depending on access. Large removals – tall Douglas firs or trees entangled with utilities – commonly reach several thousand dollars. For ballpark ranges see regional guides like HomeAdvisor. Expect emergency or storm work to carry a hazard surcharge.
Concrete example: Removing a healthy 30 foot bigleaf maple in a suburban yard with good access is typically a daytime job done with sectional removal and can be scheduled within 1 to 3 weeks. Removing an 80 foot Douglas fir that overhangs a house and crosses a power line requires an arborist plan, utility coordination, likely a crane or multi-stage sectional rigging, and may take several days on site plus 2 to 6 weeks to secure permits and schedule specialized crews.
Timeline reality: For non emergency jobs plan on 1 to 6 weeks from estimate to execution. Permits or environmental reviews add time – sometimes multiple weeks. Peak storm seasons create backlog – if your project is time sensitive, be explicit about schedule and accept higher mobilization costs.
Pruning and seasonal maintenance: techniques, timing by species, and long term planning
Pruning is an investment, not a one off chore. Done correctly it controls risk, improves structure, and reduces future costs. Done incorrectly it creates decay pockets, weak unions, and recurring hazards that cost more to fix than the original work.
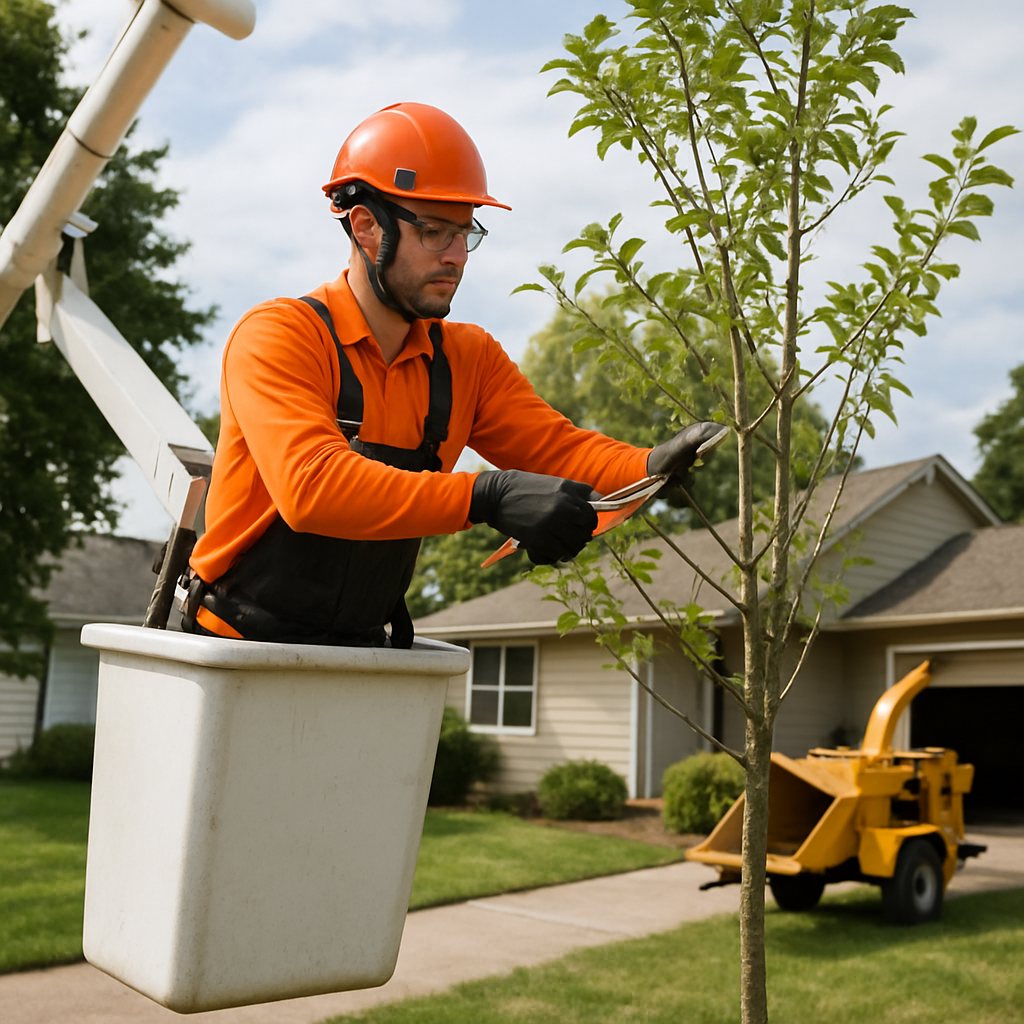
Pruning objectives matter before you cut. Safety pruning removes immediate hazards. Formative pruning shapes young trees for a strong future. Thinning improves wind permeability and light. Crown reduction is a last resort that requires proper branch selection and should not be confused with topping. Follow ISA standards for cut placement and the International Society of Arboriculture guidance, and check species notes from the Oregon State University Extension Service for local nuance.
Seasonal timing by common Gresham species
- Douglas fir: Minimal pruning of live leader and major branches. Prune dead limbs in late winter; avoid removing live canopy high in the tree because conifers do not regrow foliage on old wood.
- Bigleaf maple: Best pruned late winter to early spring before bud break. Expect heavy sap flow if cut very late in the dormant window; sap is cosmetic and not fatal.
- Oregon white oak: Prune in late winter to dormant season; limit flush cuts and preserve crown ratio to reduce sunscald and stress.
- Fruit trees: Prune in late winter for structure and again lightly in summer to control vigor and improve fruiting.
Practical tradeoffs to accept. Removing more than 25 percent of live crown in a season weakens most trees and increases decay risk. Frequent light maintenance is cheaper and healthier than infrequent heavy cuts. Crown reduction preserves height but shortens branch lifespan and often requires staged work over multiple years. If budget is tight, choose staged maintenance that targets structure and hazard first.
- Pruning checklist to bring to an estimate: Scope of cuts with maximum wound sizes, percentage of crown removal per tree, reason for each cut (safety, form, clearance), who will supervise on site, cleanup and chip or haul plan, follow up schedule for 1, 3 and 5 years, and confirmation that the contractor follows ISA pruning standards.
- Homeowner limits: Remove minor deadwood or branches under 1.5 inches if comfortable and safe. Anything larger, near utility lines, or requiring climbing and rigging should be left to a licensed crew or a certified arborist.
Concrete example: On a typical residential lot with two street trees and three yard trees set up a simple cycle. Year 1: formative pruning on young street trees and hazard prune one large yard maple. Year 3: thin crowns on two mature trees and corrective pruning on an overgrown ornamental. Year 5: repeat thinning and a health assessment with soil test and targeted fertilization. Staggering work keeps each visit under a modest budget and avoids emergency removals later.
Stump grinding, root management and replanting options
Key point: Stump grinding is the fastest way to clear a site, but it is not the same as removing the entire root system — that matters for reuse, drainage, and disease management.
When to grind and when to remove roots
Practical distinction: Stump grinding grinds the bole and the top portion of the major roots into chips; full stump removal excavates the stump and roots. Grinding is cheaper, faster, and less disruptive. Full removal costs more, leaves a deeper hole, and is usually only worth it when roots are causing structural damage, you need the entire root mass gone for heavy construction, or the removed tree had a contagious root disease.
- When choose grinding: fast site cleanup, planting a lawn or patio, avoiding heavy excavation
- When choose full removal: roots under foundation or sewer lines, landscaping that needs no remaining roots, confirmed root pathogens like Armillaria
Trade-off to know: grinding leaves root fragments that rot over months to years; that organic matter can lower soil oxygen and temporarily tie up nitrogen. If you plant immediately, plan to add fresh topsoil and a measured fertilizer plan to avoid early growth stress.
Root barriers, soil remediation and replant timing
Root control options: a root barrier can protect foundations and pipes but it redirects roots and can concentrate growth at barrier ends. Barriers are a symptom management tool, not a cure. Use barriers where roots threaten structures and combine with proper species selection to avoid future conflicts.
Replanting timing: you can often replant in the same spot after grinding if you remove large remnant roots, backfill with clean topsoil, and allow a short settling period (weeks to a few months). If the removed tree had a disease or pest problem, wait longer and avoid planting the same species.
- Quick reuse: grind, remove large roots, add 6–12 inches of fresh topsoil, plant within 1–3 months
- If disease present: test soil or consult an arborist, and consider full root removal or planting a non-host species after 6–12 months
Recommended replanting species for Gresham yards
- Pacific dogwood: compact, good ornamental value, requires well-drained soil
- Oregon white oak: long-lived native, deep roots reduce sidewalk conflict if given space; slow starter
- Bigleaf maple: fast canopy return but aggressive roots — avoid near slabs and utilities
- Native understory shrubs (red osier dogwood, salal): excellent for erosion control and quick cover
Concrete example: A Gresham homeowner had a 24 inch maple stump in a side yard. Crew ground the stump to 6 inches below grade, removed major lateral roots, filled the cavity with screened topsoil, and planted an Oregon white oak 18 inches off the former stump center. Two years later the oak established without root competition and the yard regained usable space.
Judgment call: if your priority is speed and low cost, grind and plant with soil amendments. If you are preparing for a foundation, new utility line, or the removed tree showed disease, invest in root excavation and lab testing — cutting corners here costs more later.
If disease caused the removal, do not replant the same species in the same hole without consulting an arborist or doing a soil/roots inspection.
Next consideration: after grinding decide whether you want quick turf or a long-term tree; that choice should drive how much root you remove and what soil remediation you budget for. For planting help and permit questions consult an arborist or Oregon State University Extension Service guidance.
Tree health, pests and disease management for Gresham properties
Key point: early detection is the single biggest determinant of whether a tree can be saved. Once major root rot or trunk failure sets in, biological fixes are limited and removal becomes the safest option.
Start your inspection with obvious, local signs: reduced canopy density, dead branch tips, fungal fruiting bodies at the base, sunken or cracked bark, and abnormal leaf symptoms such as chlorosis, early browning, or distorted growth. Look for secondary signals — sawdust at the root crown or tiny boreholes — that point to insects rather than a pure fungal disease.
A practical diagnostic workflow
- Visual inspection first: document canopy loss, bark wounds, and fruiting bodies with photos from multiple angles.
- Soil and root check: probe around the dripline for soggy soils, root heave, or shallow roots; order a soil test if vigor is low.
- Targeted scouting: look for insects, sticky honeydew, or entry holes; set traps or sticky bands if borers are suspected.
- Arborist lab tests: when cause isn't clear, engage a certified arborist for tissue cultures or fungal ID through a lab.
- Action plan: prioritize cultural changes (mulch, irrigation, compaction relief) and only apply targeted treatments when diagnostics confirm the pest or pathogen.
Trade-off to weigh: chemical and systemic treatments can halt certain pests quickly, but they do not fix poor site conditions. Investing in soil health, correct mulching, and root protection often yields longer-term resilience than repeated pesticide applications.
Homeowners routinely misunderstand how fast some problems spread. Limitation: systemic fungicides and insecticides are time-sensitive; they work best before the canopy collapses. If you wait until visible decline is advanced, even effective treatments will often only slow decline rather than restore the tree.
Concrete example: integrated pest management for an urban oak
Concrete Example: A street oak shows thinning leaves, small exit holes near lower branches, and a bracket fungus at the root flare. The practical sequence was immediate photos and a root/soil moisture check, followed by an arborist field visit that sent wood samples to a lab. Treatment combined targeted borer control after confirmation, careful pruning of dead wood, soil aeration, and a mulch ring; chemical control was used only where monitoring thresholds were exceeded.
Judgment: in Gresham and the PNW you get more value from preserving tree vigor than from reactive spraying. Good cultural care prevents many pest outbreaks; when pesticides are necessary, choose targeted, minimally disruptive options and hire a licensed applicator.
When to call a pro: if you find fungus conks at the base, structural bark failure, repeated branch shedding, or signs of wood-boring insects — schedule a certified arborist for testing rather than guessing at a treatment.
Next consideration: if diagnostics point to an incurable root disease or structural failure, plan removal with a contractor who documents findings for insurance and who discusses replanting options suited to Gresham conditions; see local service options at Mr. Tree Inc. services.
How to choose a local tree service and why Mr. Tree Inc. is a practical option
Start with three non-negotiables: up-to-date general liability, workers compensation, and a written scope of work. If a contractor can't or won't show insurance certificates and a clear, line-item estimate after a site visit, move on. Cheap online quotes without inspection are almost always optimistic and risk hidden charges or unsafe shortcuts.
Vetting checklist — what to verify on the estimate visit
- Proof of insurance: current certificates for general liability and workers compensation showing your property as the job site.
- Supervision and qualifications: name of the on-site supervisor and whether a certified arborist will inspect or sign off on the job.
- Written scope and exclusions: stump grinding, hauling, chip disposal, permit handling, and restoration explicitly listed.
- Equipment and access plan: crane, aerial lift, or ground rigging required; any property protection (sod boards, cribbing) described.
- References and recent jobs: local references or photos from the last 6 months showing similar work in Gresham.
- Payment terms and change orders: deposit amount, milestone payments, and how unforeseen hazards are priced.
Key question to ask on-site: who handles permits and utility coordination? A vendor that avoids this is costing you time and liability. Confirm they will call locates and coordinate with the utility when work approaches power lines.
- Do you send a certified arborist for assessments and where will their findings be recorded?
- What is your emergency response window during windstorm season and is there a surcharge?
- How do you protect nearby landscaping and hardscape during removal or stump grinding?
- Who is responsible for City of Gresham permit submissions and inspections?
Trade-off to accept: you can save 10–30 percent with a lower bid, but expect slower crew, smaller equipment, and potentially higher risk of property damage or permit mistakes. Paying more often buys speed, staff depth for complex rigging, and written documentation useful for insurance claims.
Concrete example: A homeowner has a 50-foot bigleaf maple leaning toward a garage. Two bids arrive: a low-cost crew that promises removal for a flat rate without a site visit, and Mr. Tree Inc., which sends a certified arborist, lists a rigging plan to protect the garage, includes permit handling, and prices stump grinding and chip hauling separately. The slightly higher Mr. Tree bid reduces the chance of damage and speeds permit clearance — important when insurance reimbursement depends on proper documentation.
Why Mr. Tree Inc. is practical for Gresham homeowners: they combine local experience with full-service capability — from on-site arborist assessments to emergency response and permit handling — which matters in a city with overlay zones and frequent storm calls. Use their services page for scope details and their emergency page for urgent needs: Mr. Tree services and Mr. Tree emergency services.
Important: ask for certificates of insurance and a written scope before any payment. If a company hesitates, walk away.
Next consideration: schedule an on-site estimate, bring the vetting checklist, and insist the company provides a written estimate and proof of insurance before work starts.
0 Comments