

Tree Thinning Services Explained: Benefits for Safety and Forest Health
Overgrown, crowded trees are more than an eyesore; they raise the chance of storm damage, speed the spread of wildfire, and accelerate decline across a stand. Tree thinning services reduce canopy density and stand competition to lower those risks and boost residual tree vigor. This article explains common thinning methods, what a professional job looks like, permitting and cost realities, and when to hire a certified arborist so you can choose the right approach for your property.
When to Choose Tree Thinning: signs, timing, and objectives
Direct decision point: commission professional tree thinning services when tree density is causing measurable hazards or persistent decline that pruning alone will not fix. Thinning is a stand-level intervention – not a cosmetic trim – and should be treated as a project with objectives, not a one-off cleanup.
Signs that thinning is the right intervention
- Chronic competition: several trees of similar size within a 15 to 25 foot radius where some individuals show thin crowns, suppressed growth, or dieback.
- Ladder fuels present: low branches and dense understory create vertical pathways for ground fire to reach the canopy – a classic wildfire risk that thinning interrupts.
- Repeated limb or stem failures: if limbs routinely fail during storms because crowns are heavy or rubbing, thinning to reduce weight and sail area is appropriate.
- Stand-wide decline: multiple trees across a block showing slow radial growth, extensive epicormic shoots, or increased pest activity indicate competition-driven stress.
Practical insight: do not treat thinning as spot pruning. It requires a measurable objective – for example, increase canopy separation to 10 to 20 feet near structures or reduce basal area by a target percentage across the stand. A competent arborist will state those targets in writing.
Timing and seasonal considerations
Season matters: dormant-season thinning is safest for many hardwoods and reduces sap bleeding for species like maples and birch, while late summer or early fall is often preferred for conifers in fire-prone zones to minimize resin exposure. Avoid active nesting season unless an inspection clears the work.
Trade-off to accept: winter or dormant work can expose trunks to winter sunscald and make wounds more visible, while summer thinning stresses trees during hot months. The right season depends on species, local climate, and the project objective – hazard reduction often justifies off-season work.
Concrete example: In a suburban property bordering wildland, a 0.5 acre stand of ponderosa pine was selectively thinned in late summer to create horizontal and vertical separation, remove ladder fuels, and keep 40 to 60 percent canopy cover near the house. The homeowner accepted a more open visual immediately because the measurable reduction in crown continuity lowered wind-driven crown-fire potential.
What people misunderstand: many assume thinning is cheaper than removal and always preserves all trees. In practice selective thinning is more time intensive per retained tree than simple cutting and requires skilled judgment – over-thinning or under-thinning both produce poor outcomes. Mechanical thinning saves time on large acreage but sacrifices selectivity and can damage residual trees if not supervised by an arborist.
basal area reduction, confirm timing relative to nesting season, and verify an arborist-led plan with permit review if required. For an arborist consultation, see arborist services and consulting.
Next consideration: schedule a certified arborist assessment that ties the thinning scope to specific safety metrics and a seasonal plan, so the work solves the problem you actually have rather than creating visual or ecological surprises.
How tree thinning reduces safety risks on property and in forests
Direct effect: professional tree thinning services reduce the two things that actually cause harm during storms and wildfires – continuous fuels and excessive mechanical loads. By selectively removing trees and branches that connect ground fuels to the canopy and by opening crowns, thinning breaks the pathways that let fire race through a stand and lowers the wind sail that stresses trunks and major limbs.
How thinning interrupts fire and storm failure pathways
Mechanics matter: thinning addresses safety through three measurable changes – increased horizontal crown separation, reduced vertical ladder fuels, and lower crown density. Each change reduces a different failure mode: horizontal separation limits crown-to-crown fire spread, vertical separation prevents surface fires from climbing into crowns, and density reduction cuts wind pressure on individual trees.
Practical limitation to accept: thinning lowers the probability and intensity of crown fire but will not stop embers from igniting roofs, decks, or dry landscaping. Effective risk reduction pairs thinning with defensible space work, roof screening, and removal or relocation of combustible materials. For fuel-management context see US Forest Service.
Concrete example: a small commercial lot with older oaks and maples had repeated limb failures onto a driveway. A targeted thinning created about 12 to 15 feet of horizontal separation between retained crowns along the drive and 10 feet of vertical clearance for emergency vehicles. Within one winter the property saw fewer fallen limbs under typical wind loads, and crews could safely stage a ladder truck for inspections.
- Trade-off – visual change: thinning can leave a more open look that some owners dislike initially; the safety gain is immediate but aesthetics often recover as residual trees expand.
- Trade-off – habitat shifts: some bird and small mammal species lose dense cover; selective retention of snags or grouped thickets preserves critical habitat while meeting safety goals.
- Trade-off – follow-up work: reduced canopy allows more sunlight to reach the understory which can trigger brush growth that requires vegetation management or brush clearing services.
What people underestimate: unskilled or overly aggressive thinning can create wind-flagging and crown imbalance that increases future failure risk. Mechanical thinning is efficient on large tracts but needs arborist oversight near structures, utilities, and sensitive soils to avoid collateral damage. Always require an arborist assessment and a clear scope tying thinning actions to safety metrics.
Next consideration: prioritize thinning where trees are closest to structures, power lines, and access routes, and confirm the plan includes post-thinning vegetation control so the safety gains are sustained.
How thinning promotes tree vigor and long term forest health
Core outcome: when done with a clear stand objective, selective thinning reallocates limited resources so the retained trees grow stronger rather than simply surviving. Removing crowded stems reduces belowground competition for water and nutrients and shifts carbohydrate allocation from excess shoot production toward root and cambial growth, which improves drought tolerance and structural strength over several seasons.
Why the biology matters in practical terms
Physiological effect: more light reaching mid- and lower crowns raises photosynthetic capacity in remaining trees, while reduced crown density lowers transpiration demand. The net result is better root-to-shoot balance, faster wound closure, and fewer epicormic sprouts that signal stress. That combination cuts the odds of chronic decline and makes trees more resilient to episodic stresses like drought or beetle pressure.
| What to track after thinning | Why it matters |
|---|---|
| Annual radial growth (increment on surviving stems) | Tracks recovery in cambial activity and vigor |
| New deadwood incidence | Indicates lingering stress or pruning injuries that need follow up |
| Understory response and invasive spread | Shows whether additional vegetation management or brush clearing is required |
| Canopy closure over 3 years | Measures whether thinning met light and spacing objectives |
Practical trade-off: thinning usually speeds tree recovery but often exposes trunks and crowns to more light and wind. That can temporarily increase sunscald or wind-flagging on marginal individuals. The correct clinical judgment is to retain trees that are structurally sound and to plan staged thinning on sensitive sites, rather than removing heavily and hoping everything adjusts at once.
Operational limitation: benefits depend on which trees you keep. Salvaging low-vigor stems to preserve canopy cover is a common mistake – those trees drain resources and reduce the overall stand response. A credible arborist will identify crop trees to prioritize and document expected outcomes, not just cut to a visual template.
Concrete example: on a half-acre backyard woodland where young maples had colonized beneath older oaks, a selective release left the healthiest oaks as crop trees and removed competitive maples clustered within oak root zones. Within two growing seasons the oaks showed fuller crowns and fewer dieback symptoms; the cleared understory also allowed targeted mulching and native groundcover planting to reduce post-thin brush growth. For coordinated follow up see mulching and fertilization and pest and disease management.
Thinning methods explained and when to use each
Straight answer: there is no single thinning technique that fits every objective. Choose the method that matches the problem you need solved — hazard reduction, growing a few high-value trees, restoring uneven-aged structure, or clearing fuel across large acreage — because each approach changes stand structure and post-work maintenance in different ways.
Common methods and the situations they suit
- Crown thinning: remove interior branches to reduce crown density. Best for hazard reduction near homes and lowering wind load; visual impact is moderate and recovery is generally quick.
- Crown cleaning: cut out dead, dying, and diseased limbs. Use where safety from falling branches is the priority; this is not a density-control method on its own.
- Low thinning: remove lower branches to raise the lowest live crown. Use along driveways, access corridors, and around structures to remove ladder fuels and improve vehicle and equipment clearance.
- Crop tree release: cut competitors around selected specimens you want to grow. Use in landscape and timber contexts where you want a few dominant trees to improve form and long-term value.
- Group selection: remove small groups to create openings and encourage regeneration. Best for restoring mixed-age stands and increasing understory diversity; it alters habitat structure more than single-tree methods.
- Mechanical thinning: use machines to remove many stems quickly. Appropriate for large tracts and commercial operations; efficient but less selective and carries higher risk of root and soil disturbance.
- Commercial or salvage thinning: remove trees to recover value and reduce density simultaneously. Used where merchantable material offsets costs; may require different permits and logistics.
Practical trade-off: the more selective the method, the higher the per-tree labor cost but the better the long-term structural outcome. Mechanical approaches lower short-term cost per acre but increase the chance of collateral injury to residual trees and soil; plan for staged follow-up treatments when machines are used.
Species and site judgment: pines and other fire-prone conifers usually benefit from crown and low thinning to reduce crown continuity, while long-lived hardwoods often respond better to crop-tree release and selective removals. On steep or wet soils prioritize hand work to avoid compaction and erosion.
Example use case: a homeowner with a mixed pine-oak border wanted wildfire defense but kept mature oaks for shade. The crew performed low and crown thinning on the pines within 50 feet of structures, used crop-tree release around the oaks, and left grouped thickets farther upslope for habitat. Result: immediate fuel separation near the house and preserved aesthetic shade where the client wanted it; follow-up brush clearing was scheduled for the sunnier understory.
Key practice: always ask for a written prescription that lists the method, retention targets (for example percent crown density or desired canopy separation), and follow-up obligations — this is the single most important control on quality and outcomes.
Next consideration: pick the method that meets your primary objective, require arborist oversight when selectivity matters, and budget for the likely follow-up work — vegetation control after thinning is common and should be part of the initial plan. For professional prescriptions and on-site estimates see arborist services and consulting and tree trimming and pruning.
What to expect during a professional thinning service
Straightforward reality: a professional thinning job is a planned operation with measurable targets, safety controls, and a short monitoring window afterward. Expect an arborist-led prescription that describes what will be removed, what will be left, and why those choices serve the safety or health objective you agreed on.
Practical trade-off: crews balance selectivity and speed. Hand-climbing and selective cuts protect residual trees but cost more and take longer; mechanical methods cut price and time on large tracts but increase risk of soil disturbance and collateral damage. Decide which matters more for your site before signing a scope of work.
Step-by-step workflow you will actually see
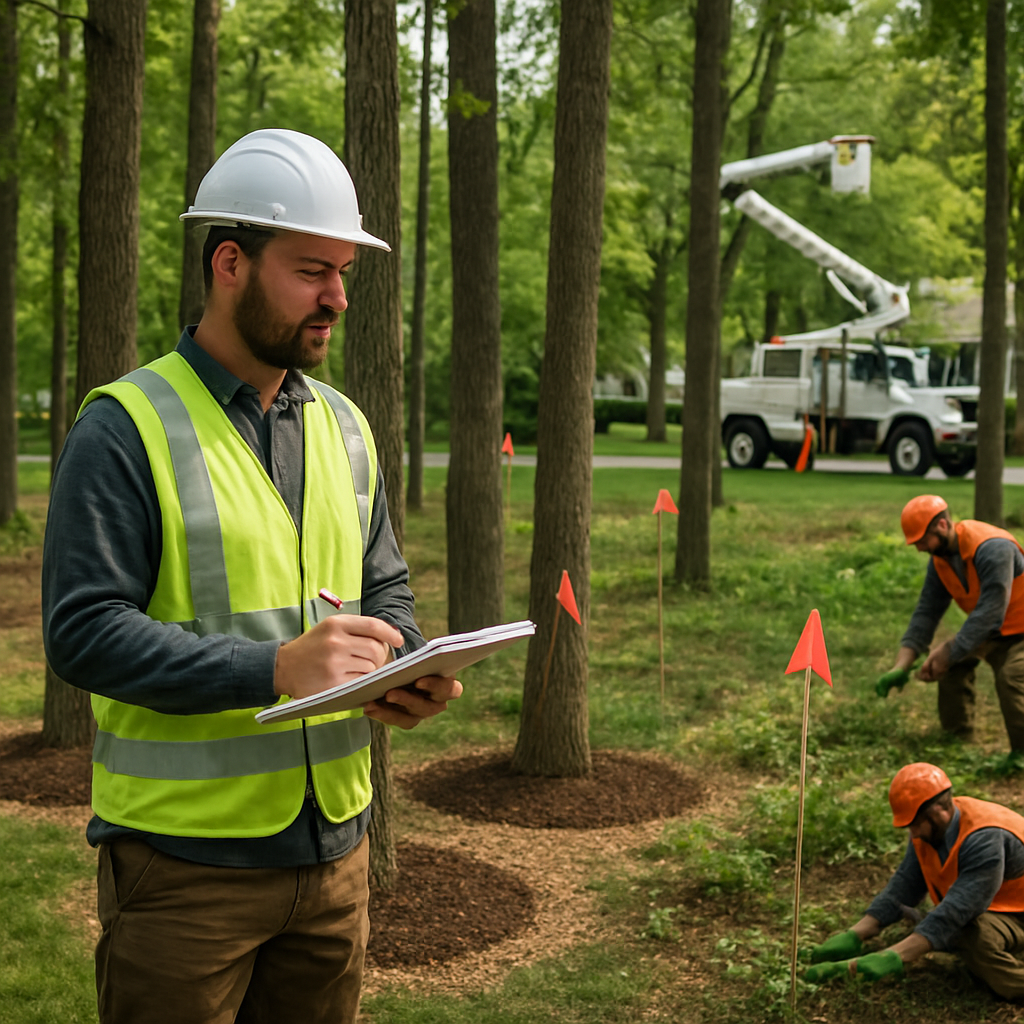
- Pre-visit inventory: an ISA-certified arborist or forester documents species, DBH range, hazards, and access constraints and produces a site-specific prescription. Request the written plan and maps.
- Permits and notifications: contractor confirms permits, utility coordination, and any timing limits for nesting season or protected species before mobilizing.
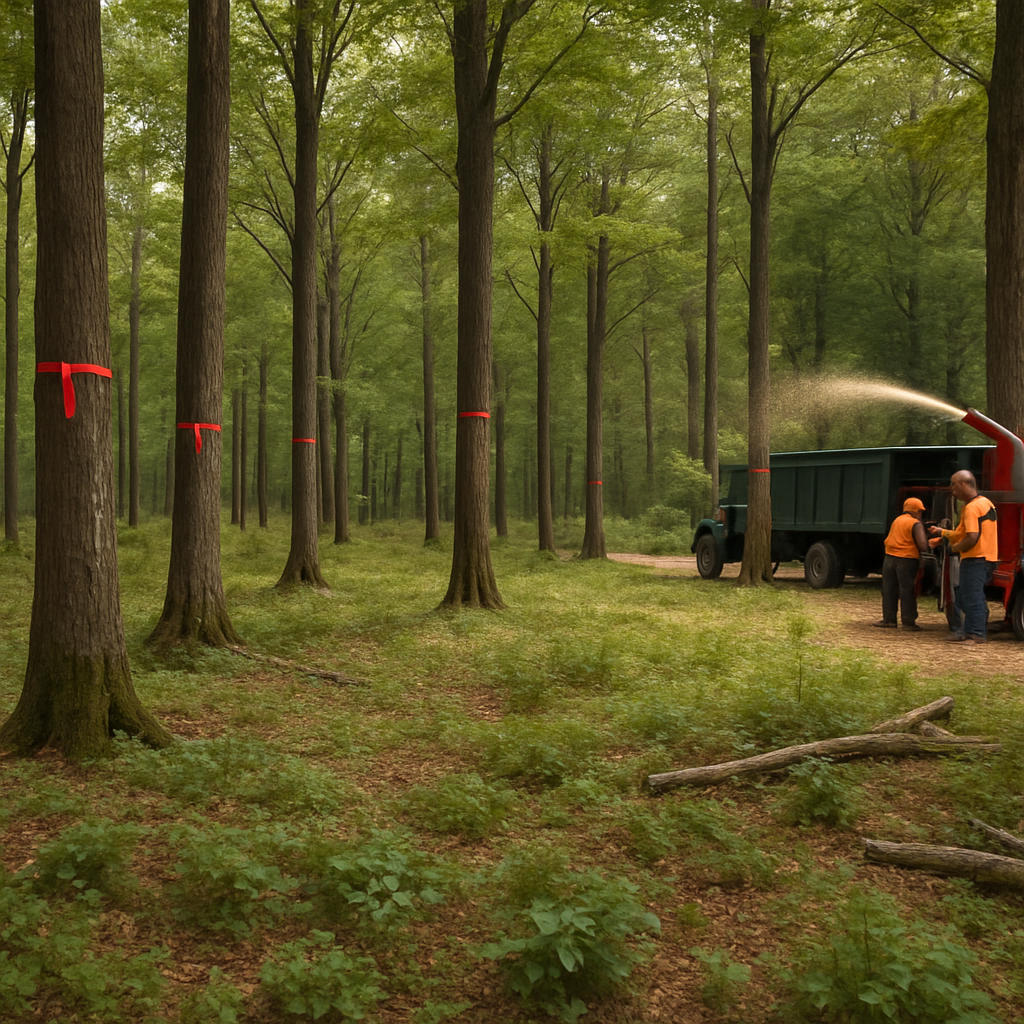
- Flagging and exclusion zones: trees to remove or retain are flagged; no-work zones and sensitive features (springs, landscaped beds, archaeological sites) are marked to prevent mistakes.
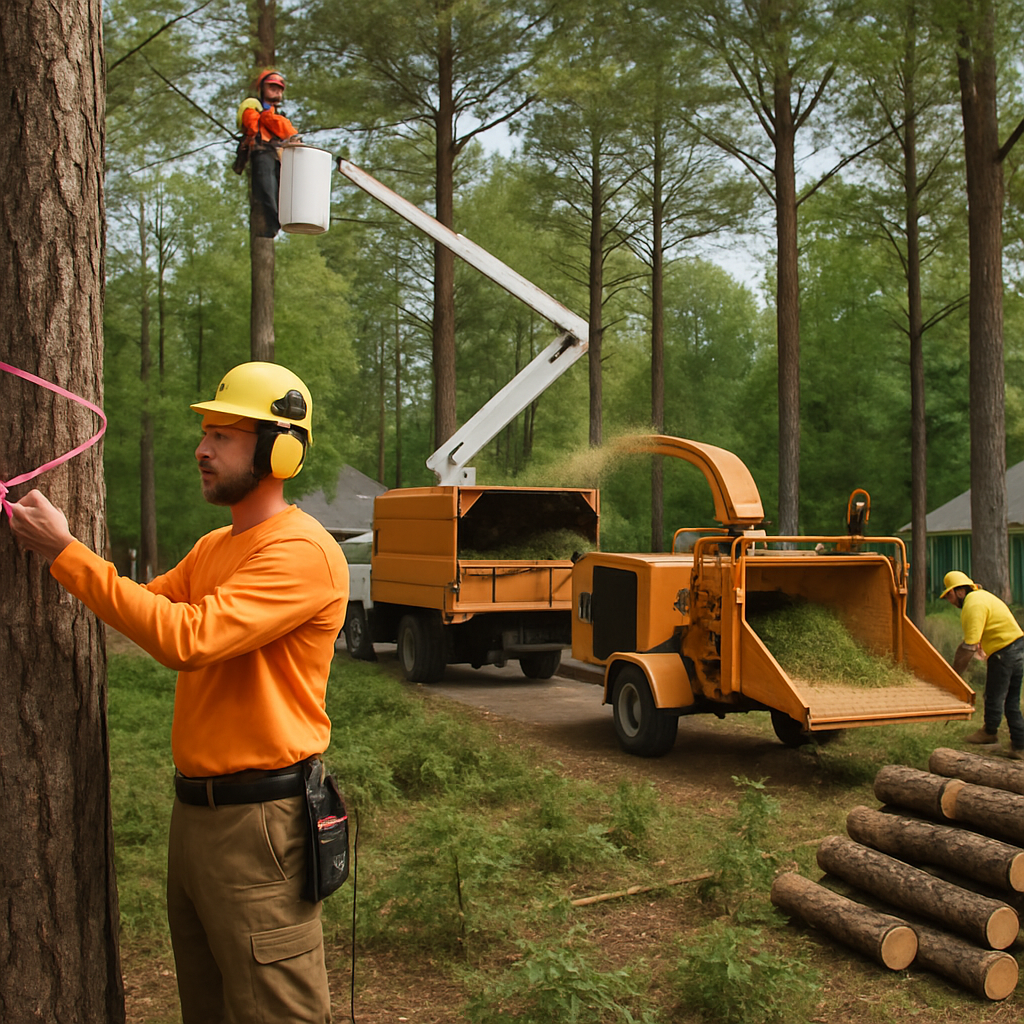
- Execution phase: crews perform the thinning method specified (selective single-tree removal, crown thinning, low thinning, or mechanical felling) using aerial lifts, climbing rigs, and chainsaws as appropriate.
- Debris handling on site: chips are produced for mulch, salvaged logs staged for firewood, and excess material hauled to green-waste facilities per the disposal plan.
- Safety and traffic control: exclusion perimeters, ground-spotters, and if working near roads or utilities, flaggers and utility lockout coordination will be in place.
- Final inspection and documentation: arborist inspects the work, records before/after photos, and leaves a short follow-up schedule or recommendations for monitoring.
Equipment and crew roles matter: you will typically see a lead arborist, a climber or lift operator, a chipper operator, and a ground crew handling logs and debris. On steep or sensitive soils expect smaller tools and more hand work to avoid compaction.
Concrete example: a homeowner with trees near a primary service line had a two-day job: day one for arborist mapping and utility coordination, day two for targeted low and crown thinning using a bucket truck to protect the service line. Crews chipped slash into mulch for on-site reuse while leaving two large logs for the homeowner as firewood, and the arborist delivered a one-month and one-year inspection schedule.
Important: inexpensive, same-day quotes that rely on photos almost always miss access issues and hidden hazards — insist on a site visit for any credible written estimate.
Next consideration: before you approve work, confirm the arborist will return for a 6-month check and provide simple performance targets (for example percent canopy separation or vertical clearance) so the thinning delivers the safety or vigor outcomes you paid for. For an arborist-led prescription and on-site estimate, see arborist services and consulting.
Costs, permits, and environmental compliance
Straight to it: the price tag and legal work around a thinning job are not add ons you can bolt on at the end. They shape the technique crews use, the schedule, and the ecological outcomes. Expect costs to reflect access difficulty, tree size and species, method (hand versus mechanical), disposal choices, and whether an arborist must secure permits or coordinate with utilities.
Typical cost structure and what drives price
Practical insight: small selective thinning jobs are billed largely by complexity, not just by tree count. A single large tree near a house with power lines can cost as much as several smaller roadside stems because of rigging, lift work, and utility coordination.
Below are realistic ranges to use as planning anchors – treat them as ballpark figures to prompt a site visit, not final quotes. Regional labor rates and landfill fees can shift these numbers substantially.
- Per-tree selective thinning: small trees commonly run from about $150 to $400 each; mid-size trees $400 to $900; large or hazardous stems often exceed $900 per tree.
- Per-acre mechanical thinning: typical range is roughly $250 to $1,500 per acre depending on density and terrain; steep or rocky ground pushes costs to the high end.
- Job-level costs: expect mobilization, arborist assessment, and permit handling to add a fixed fee – often $200 to $1,000 – which makes small jobs proportionally more expensive.
Trade-off to accept: cheaper bids often cut corners on planning and permits. If a contractor bypasses a required permit or skips erosion controls, you may save upfront but face fines, stop-work orders, or costly restoration later. Budget a contingency of 15 to 30 percent for permit-related mitigation and unexpected disposal.
Permits, environmental limits, and required documentation
What typically triggers permitting: work in municipal zones with tree protection rules, removal of trees above a DBH threshold, projects in riparian buffers or wetlands, large-volume merchantable removals, and thinning that disturbs slopes or soils. Local planning departments and fire agencies also impose seasonal limits for nesting birds and fire-season restrictions.
- Documents to obtain from your contractor: a signed site prescription from a certified arborist, copies of any required permits and permit conditions, proof of general liability and workers compensation insurance, and an erosion or sediment control plan when slopes or waterways are involved.
- Coordination items: written utility notification or lockout confirmation when work is within the proximity of service lines, and a disposal plan showing whether chips are reused on site, hauled to a green waste facility, or salvaged as firewood.
Judgment call: accept modest delays for proper permits. Fast turnarounds that skip local approvals are red flags. A two week wait for a clearance or nesting survey is a reasonable price to avoid legal and ecological risk.
Concrete example: a rural property owner contracted mechanical thinning across 10 acres. The county required a sediment control plan and a timber harvest notice because work was on slopes above a creek. The permit process added three weeks and about 12 percent to the job cost, but prevented soil loss into the creek and a potential enforcement citation. Mr Tree can handle permit submittals and the arborist signoffs – see arborist services and consulting.
Budgeting tip: ask for an itemized bid separating arborist fees, permit handling, disposal, and labor so you can compare apples to apples and identify where added cost buys risk reduction or regulatory compliance.
Aftercare and monitoring: maximizing the benefits of thinning
Immediate reality: thinning delivers the safety and vigor improvements on day one, but those gains fade without a disciplined aftercare plan. Monitoring and targeted interventions in the first three years are the difference between a one-time makeover and a durable, lower-risk stand.
Practical monitoring timeline
- 0 to 30 days: confirm debris removal is complete, correct any soil compaction in work corridors with light aeration, and apply a controlled 2 to 3 inch mulch ring around retained trees – avoid piling mulch against trunks.
- 1 to 3 months: inspect for acute damage such as bark abrasions, cambial exposure, new insect activity, or significant sunscald on previously shaded stems; treat wounds or erect temporary protections where needed.
- First growing season: measure shoot extension on crop trees and note epicormic sprouting – heavy epicormic response usually signals over-stress or a missed structural defect requiring pruning.
- Annual checks for 3 years: verify canopy redistribution, monitor regrowth of ladder fuels, and perform corrective pruning or targeted vegetation control as regrowth demands.
What to track that actually predicts success: use simple, repeatable indicators rather than vague impressions. Track percent live crown ratio on priority trees, lateral shoot length on key scaffold branches, visible bark damage or splits, and the presence and density of reestablishing ladder fuels within a 10 to 20 foot buffer of structures or access routes.
Practical tradeoff: aggressive fertilization can accelerate crown recovery but also increase fine fuels and ladder-vegetation density. If the goal is wildfire risk reduction, prioritize structural recovery and root health over rapid foliar growth. Soil testing should guide any nutrient program.
Concrete example: after a selective thinning for defensible space, a crew applied chipped mulch across the site. The homeowner later piled extra chips against several trunks which trapped moisture and attracted vole activity. The contractor removed the excess, rebuilt proper mulch rings, and scheduled a six month inspection to check for bark damage and rodent impacts.
A judgment most owners miss: one good thinning followed by no follow up is the most common failure mode. Light-demanding invasive brush or fast-sprouting stump suckers will reclaim gaps if not controlled early. Plan for at least one targeted vegetation-management visit and one structural pruning session within two years.
Final takeaway: aftercare is not optional. Insist on a written short-term monitoring plan, modest budget for follow-up work, and clear success indicators tied to your original thinning objectives – safety, vigor, or habitat balance. That is how thinning becomes a long term investment rather than a temporary change.
How Mr Tree approaches thinning projects and integrated services
Direct approach: Mr Tree treats thinning as a project, not a one-off cut. Work begins with a site-specific assessment, clear objectives tied to risk or vigor metrics, and a service sequence that bundles the field work with follow-up care so the thinning produces lasting results rather than a temporary visual change.
Assessment and prescription: an ISA-certified arborist performs a measured inventory (species, DBH, defect mapping) and produces a written management plan with target metrics such as desired horizontal crown separation or percent canopy retained. Geotagged photos and simple site maps are standard — they keep the team honest and let you see exactly what was done where.
Integrated services offered: Mr Tree layers thinning with services you will likely need after cuts: targeted pest and disease treatments, mulching and fertilization, brush clearing, stump grinding, and emergency response coordination. These are not add-ons tacked on later; they are scheduled in the plan so timing (for example soil amendments versus follow-up pruning) matches tree recovery windows. See arborist services and consulting and coordinated options like mulching and fertilization.
- Who runs the job: Lead arborist — sets objectives and signs the plan
- Who executes: Crew lead and climbers/lift operators — perform selective cuts
- Who supports: Chipper and skid operators — manage debris and staging
- Who documents: Field tech — records geotagged photos and post-work map
- Who coordinates: Permit/utility liaison — handles approvals and line work
Practical trade-off: bundling services reduces logistic friction and usually lowers total cost, but it can also lock you into a scope that grows if not controlled. Insist on an itemized plan with scheduled checkpoints; on sensitive sites Mr Tree will stage work over multiple visits rather than deliver everything in a single push to reduce shock to the stand and limit invasive-sprout response.
Concrete example: on a mixed residential slope, Mr Tree split the job into two phases. Phase one used hand-selection to thin trees nearest the house, chip for onsite mulch, and install sediment checks. Phase two, scheduled six months later, addressed regrowth and performed targeted pest monitoring and a small fertilizer application informed by a soil test — the staggered schedule preserved root stability on steep ground and avoided excessive early foliar flush.
On-site coordination and documentation
Accountability measures: the crew leaves a short work log with time-stamped photos, a map of removals and retained crop trees, and a recommended follow-up schedule. In practice this is the single thing that separates a durable job from one that looks good for a season and then reverts. Ask for those deliverables before you sign.
0 Comments