

A leftover stump does more than look bad; it creates trip hazards, harbors pests, and complicates future planting. This practical tree stump removal guide compares stump grinding, manual and chemical options, gives realistic cost and timeline expectations, and includes a DIY grinding checklist plus clear criteria for when to call a pro. Use it to pick the fastest, safest solution for your yard and to evaluate contractor quotes with confidence.
Stump Removal Methods Compared
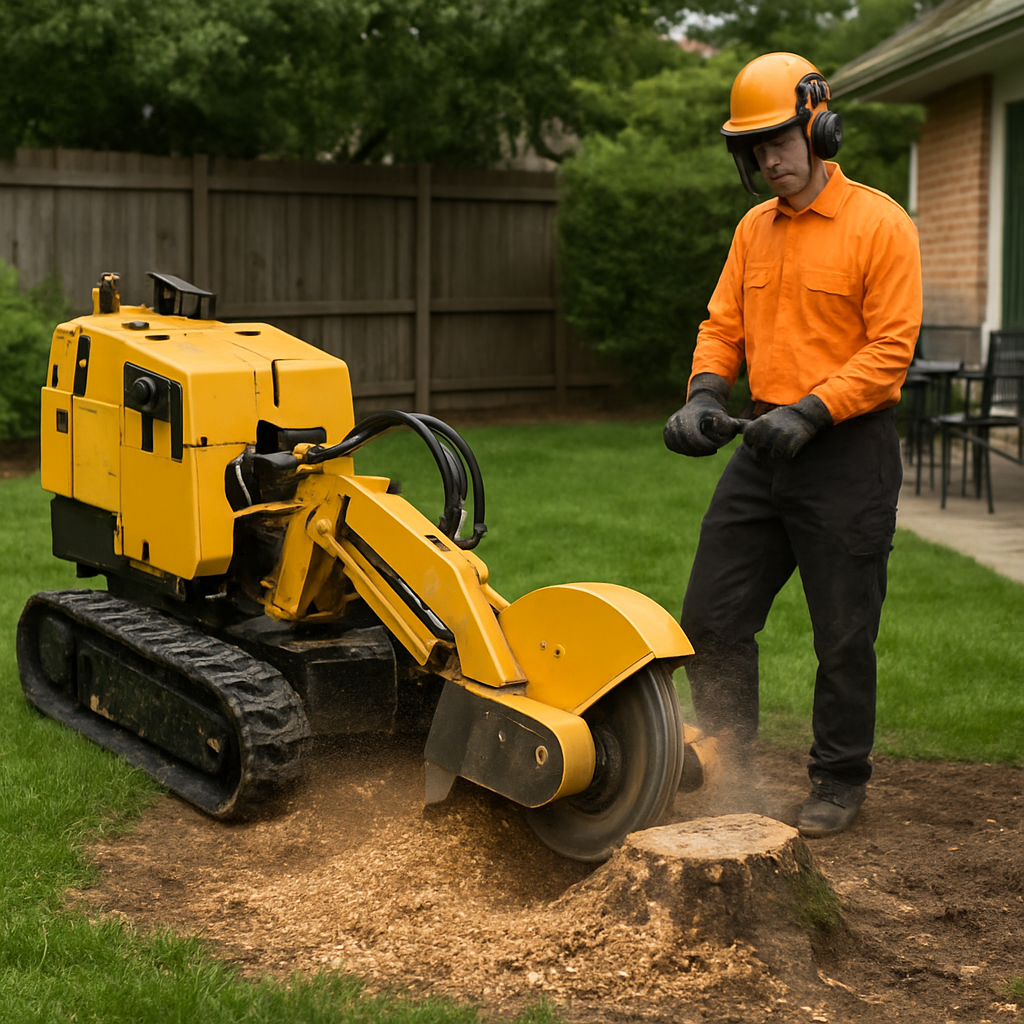
Direct fact: for most residential jobs, stump grinding is the fastest, least disruptive, and safest way to remove a stump while leaving soil ready for lawn or planting. Grinding removes the trunk and the immediate collar; it does not remove the majority of deep roots, so plan accordingly when roots conflict with foundations, septic lines, or utilities.
Mechanical options: grinding and full excavation
Stump grinding: professionals use machines like horizontal grinders or hand-held stump grinders to chip the stump down to 3 to 12 inches below grade depending on follow-up plans. Pros: fast, minimal soil disturbance, chips are reusable as mulch. Cons: major surface roots remain, machines need access (20 to 36 inch clear path), and deep grinding or root removal can add cost.
- Full excavation: complete removal of stump and main roots using an excavator or by hand and winch. Best when roots interfere with structures or when regrading is required.
- Tradeoff: excavation eliminates root regrowth and root hazards but is expensive, damages surrounding turf and hardscapes, and usually requires soil replacement and compacting.
Chemical, biological, and burning approaches
Chemical methods: potassium nitrate and commercial stump removers accelerate decay after drilling holes into the stump. They are low-effort but slow and can pose risks to pets, children, and nearby plants. Expect weeks to months of waiting, and do not rely on chemicals where fast removal or immediate replanting is required.
Natural decomposition and inoculants: adding nitrogen-rich mulch, keeping the stump moist, or using fungal inoculants will speed rot but remain a long game. This approach is reasonable for owners who do not need immediate clearance and want an eco-friendly route.
Burning and heat methods: controlled burning or heat rods can remove a stump when local ordinances allow, but they carry real fire and smoke risks and often require permits. In practice, municipalities restrict open burning more each year; verify rules before considering this option.
Practical insight: species matter. Fast-decaying softwoods respond well to chemical or natural methods; dense hardwoods and trees that sucker (for example elm or willow) often resprout from root systems after partial removal, so grinding combined with targeted root removal or follow-up chemical treatment is usually necessary.
Concrete Example: a 30-inch oak stump sitting 6 feet from a patio typically gets ground by a professional to about 8 to 12 inches below grade to allow a new planting without root conflict. If roots run under the patio, the job converts to excavation or selective root cutting by an arborist, which increases cost and recovery work on the hardscape.
Next consideration: before selecting a method, map access, nearby utilities with 811, and your timeline for replanting; those three constraints usually decide between grinding and excavation on day one.
Cost Factors and Typical Price Ranges
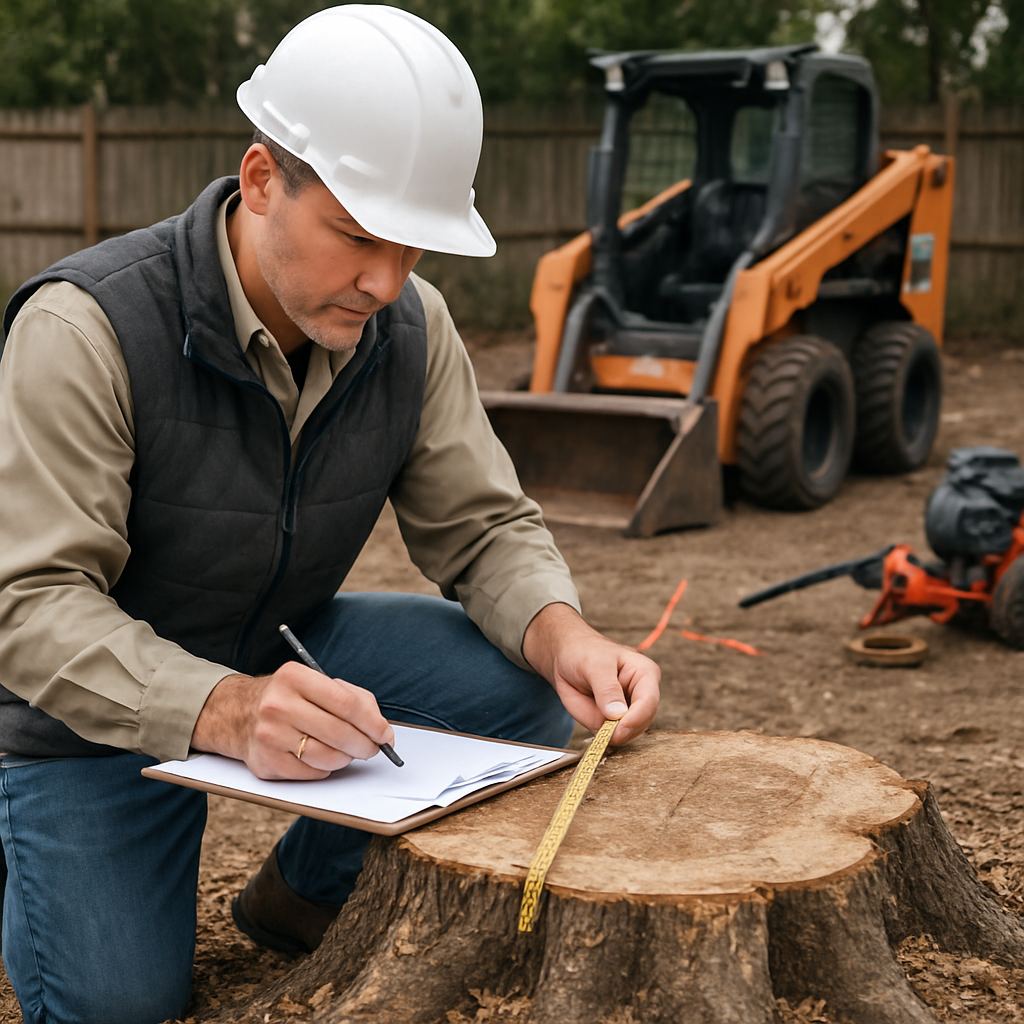
Key point: the sticker price often disguises two realities: access and root complexity usually move the needle more than trunk diameter alone, and small jobs can carry a disproportionately high effective hourly rate because of mobilization and minimum fees.
- Stump access: equipment needs a 20 to 36 inch clear path; narrow gates, fences, or steep slopes require smaller machines or hand work and add labor.
- Root complexity: species with heavy, deep roots or a dense root plate increase time and may require excavation, not just grinding.
- Number of stumps: contractors commonly apply per-stump minimums for single stumps but offer discounts for batches; ask for bundled pricing on multi-stump jobs.
- Cleanup and disposal: hauling chips off-site, hauling whole stumps, or recycling fees are separate line items on many quotes.
- Site constraints and permits: proximity to patios, septic or buried utilities often turns a simple grind into a specialty job with extra costs.
How contractors commonly price a job
Pricing mechanics: expect a combination of a trip or minimum fee plus either a per-stump flat charge, an hourly rate, or a per-inch rule for diameter. A practical formula contractors use is: base call fee + (per-inch rate × stump diameter) + access surcharge if needed. For tight yards they may switch to an hourly crew rate instead.
Concrete Example: an 18 inch maple in an open lawn might be quoted as a base fee plus a modest per-inch charge, arriving near the low-to-mid hundreds when cleanup is included. That same 18 inch stump tucked behind a fence can jump to several times that price because crews must hand-carry equipment or use a mini-excavator — the work, not the wood, drives cost.
- Common add-ons to check for: deep grinding for replanting (deeper grind = extra time), backfill and topsoil, chip hauling, hardscape protection or repair, and permit or disposal fees.
- Seasonal and regional premiums: busy seasons and high-cost labor markets increase quotes; remote or rural jobs may carry travel surcharges.
- Equipment mismatches: if a contractor plans to use a large horizontal grinder in a tight bed, get clarity — that usually signals later charges for protective measures or hardscape fixes.
Judgment: very low bids frequently omit cleanup, skip insurance, or assume easy access. Always get an itemized quote showing grind depth, what happens to the chips, whether backfill is included, and proof of insurance. Cheaper is rarely cheaper if it means you end up paying later to fix a patio, remove hidden roots, or haul away debris.
Next consideration: when you get 2–3 bids, compare line items, not just the bottom line. If a low quote excludes haul-away, backfill, or proof of insurance, it is likely to cost more in the end.
DIY Stump Grinding Checklist and Step by Step
Straight answer: DIY stump grinding is practical for a single, accessible stump if you plan the work, respect the machine, and accept the cleanup and disposal work that follows. If you want a side-by-side comparison of pros and cons before renting, see stump grinding services for how professionals scope access and cleanup.
Pre-checks and safety
- Locate underground services: notify utilities and verify buried lines with your local marking service before any grinding.
- Site protection: remove nearby furniture, flag irrigation heads, and lay plywood or steel plates to shield turf and hardscapes.
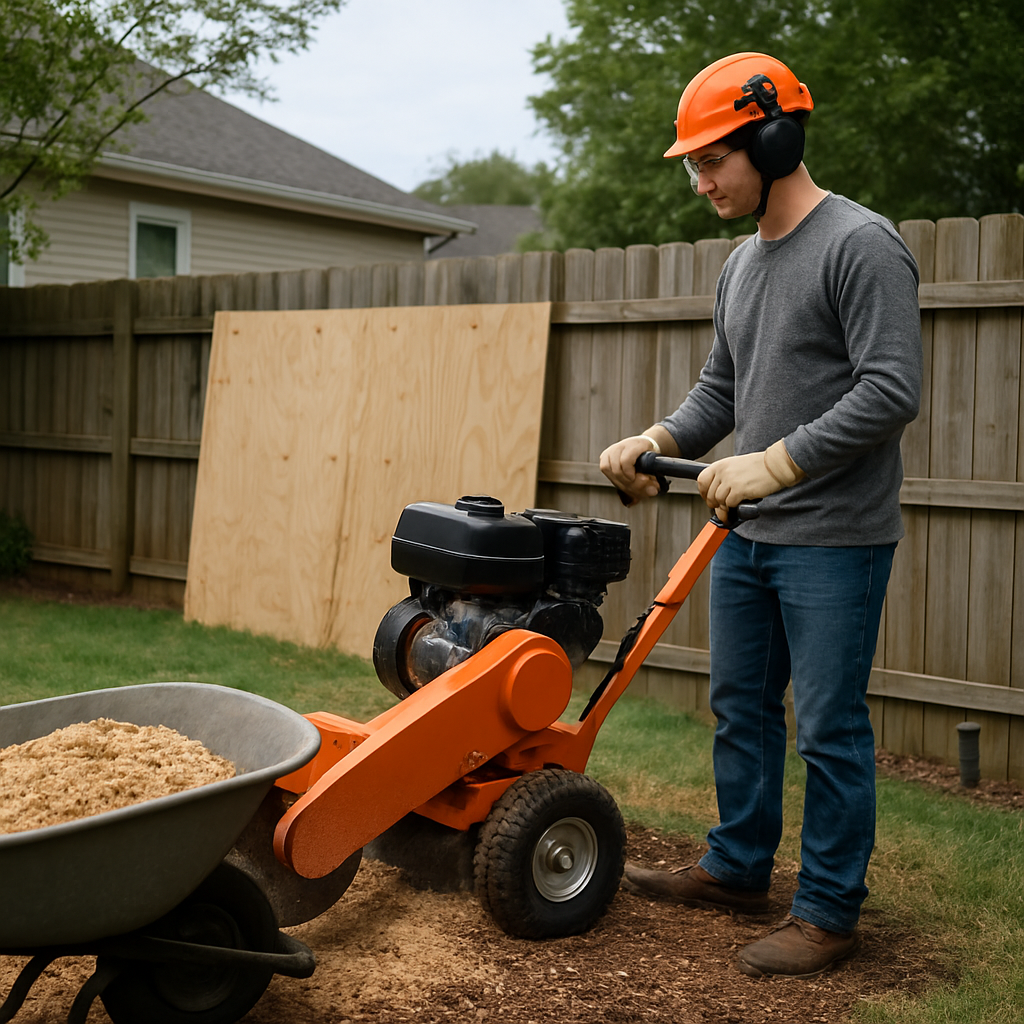
- Personal protective equipment: ANSI-rated helmet or hardhat, eye protection, hearing protection, respirator or dust mask, steel-toe boots, and gloves.
- Support crew: have a spotter to watch for hidden obstructions and a second person to handle chip cleanup and wheelbarrow work.
- Machine check: inspect rental grinder for loose guards, worn cutters, fuel leaks, and an intact kill switch; run it briefly before starting.
Practical tip: follow safety guidance from OSHA on powered equipment and noise exposure; modern cutters throw chips at high speed and you will need a tight exclusion zone.
Step-by-step grinding workflow
- Clear and mark: cut any tall remnants flush with the ground so the grinder can attack the top surface cleanly.
- Position machine and protect surfaces: place plywood under the grinder where turf or edging could be damaged; position the unit so you will pull the cutter toward you rather than push it blindly.
- Shallow, controlled passes: take a series of overlapping shallow passes across the stump rather than one deep bite; this reduces stress on the cutter and lowers the chance of throwing large chunks.
- Work around the perimeter inward: create a shallow rim then work toward the center. Keep the cutter speed steady and let the machine remove wood at its pace rather than forcing throws.
- Finish and backfill: leave the cavity slightly low relative to grade, redistribute chips as mulch or screen them for composting, and backfill if you plan lawn or planting.
Technique insight: operators who try to plunge aggressively or take deep cuts waste cutters and risk kickback. Multiple conservative passes are faster in practice because they avoid tool changes and repairs.
Trade-off to accept: renting saves money but transfers liability and skill requirements to you. If the stump is close to patios, underground utilities, or a hard-to-reach bed, the hidden cost of a mistake often outweighs rental savings.
Concrete example: on a tight urban lot a homeowner rented a compact hand-held grinder because the gate barred a full-sized unit. They protected the chain-link fence with plywood, used a spotter to feed chips into a wheelbarrow, and made steady shallow passes until the surface sat low enough for turf restoration. The job used basic PPE and careful staging instead of heavy excavation, but required additional time to screen and reuse the chips.
Takeaway: if you can handle machine setup, safe operating technique, and chip disposal, DIY grinding is cost-effective; otherwise budget for a contractor who will manage access, deeper root work, and insured cleanup.
Other DIY Approaches and Their Practicalities
Quick reality: homeowners who try alternatives to grinding usually trade money for time, or time for risk. Each DIY approach has a narrow set of situations where it makes sense; outside those, the method creates extra work or lingering problems.
Manual removal: when muscle still pays
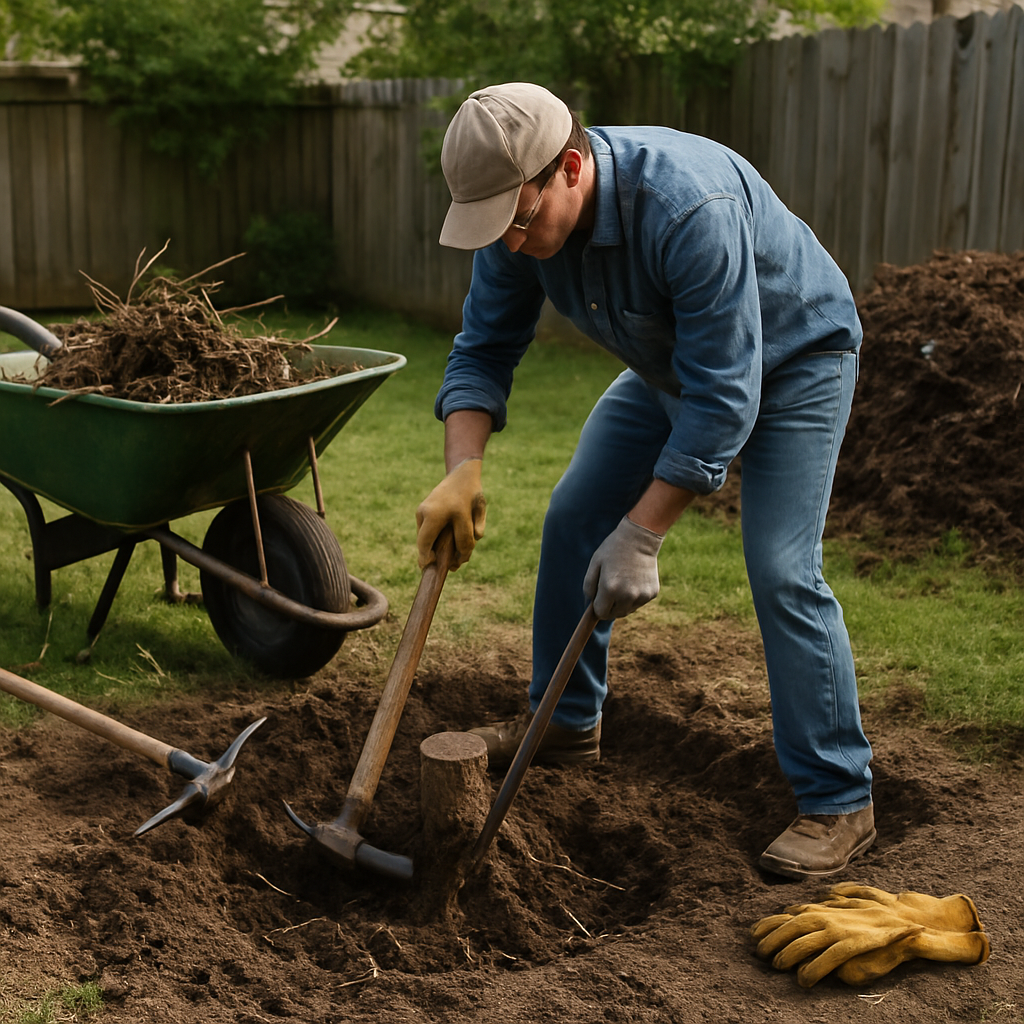
Manual excavation: digging and cutting roots with a shovel, mattock, and pruning saw avoids machines and chemicals but is physically demanding and slow. Trade-off: you remove more of the root mass than grinding, which is useful when roots conflict with a foundation or septic line, but you will leave a large hole and need to replace soil and turf.
Practical consideration: for stumps under about 12 inches and in loose soil, manual removal is reasonable; for mature trees with wide, armored root plates it becomes a multi-day job that often ends with a rented mini-excavator or a winch hook-up.
Concrete Example: a homeowner with a 10-inch spruce behind a shed dug a trench around the stump, cut roots with a reciprocating saw, and used a hand winch to lever the root ball free. The job took a full weekend but avoided rental fees and left the site ready for immediate sod.
Chemical and organic rot accelerants
Chemical removers and organic accelerants: these are low-effort but slow. Drilling a pattern of holes and applying a granular oxidizer or concentrating nitrogen-rich amendments will soften wood over months. Limitation: you do not get immediate clearance, and root systems remain structurally intact — that matters if you plan to replant or if roots run toward utilities.
Judgment: many people treat chemical stump removers like a fast hack; they are not. Use them when time is not an issue and you can isolate the stump from kids, pets, and vegetable beds. Check label directions and local waste regulations before purchase; misuse creates contamination risks.
Burning, heat tools, and controlled combustion
Burning or heat-based tools: propane burners and heat rods concentrate fire and can reduce a stump without heavy equipment. Trade-off: intensive smoke, potential soil sterilization, and almost always a permit or inspection requirement. Municipal restrictions are tightening, and insurance claims for accidental fire are common in areas where homeowners attempt open burns.
Practical consideration: only consider heat methods where local authorities allow it, and never near structures, dry landscaping, or buried utilities. In most suburban yards, a rented grinder or a contractor is a safer bet.
Natural decomposition and inoculants
Compost, fungi, and patient decay: layering high-nitrogen mulch, keeping the stump moist, and adding wood-decay fungal inoculants accelerates rot with minimal intervention. Limitation: hardwoods and dense stumps can still take years, and suckering species may resprout from roots unless the crown is fully removed.
Real-world note: this method is useful on rough lots or for homeowners focused on habitat and minimal mechanical disturbance, but it is a poor fit if you need the space back quickly or want to replant.
- Choose on three constraints: timeline, proximity to structures/utilities, and species/size — those govern whether a DIY approach is practical.
- Hidden cost: time spent babysitting a chemical treatment or hand-digging large roots is real labor cost; value it against a local stump removal quote.
- When to stop: if the job drags into unpredictable soil conditions, suspected disease, or root systems under hardscape, pause and call a professional.
Next consideration: pick the method that aligns with how quickly you need the space back and how much risk or physical labor you are willing to accept — many DIYers underestimate root reach and overestimate how fast chemicals work.
When to Hire a Professional: Clear Criteria
Quick rule: hire a pro if the job carries more risk, cost, or uncertainty than you can accept. That sounds obvious, but the decision is easier when you score specific factors instead of guessing based on size or price alone.
A practical scoring framework
Use a 0–3 point scale for each factor; higher totals favor professional help. This turns subjective worry into a repeatable decision: if the subtotal hits 6 or more, call a licensed contractor or arborist. If you score 3 to 5, weigh cost savings from DIY against the single biggest risk factor on your list.
| Criterion | Why it matters | Points |
|---|---|---|
| Stump size and root mass | Very large trunks or dense root plates need heavy-duty grinders or excavation that most homeowners cannot handle. | 0 = small (<12 in) / 1 = medium (12–24 in) / 3 = large (>24 in) |
| Proximity to structures or hardscape | Close roots and flying chips threaten patios, foundations, and nearby buildings. | 0 = >25 ft / 1 = 10–25 ft / 3 = <10 ft |
| Buried utilities or septic near roots | Accidental strikes are costly and dangerous; professionals coordinate with utility locators and use non-destructive techniques. | 0 = clear / 2 = possible / 3 = confirmed within root zone |
| Evidence of disease or pests | Infected stumps can spread pathogens; arborists identify species-specific risks and legal constraints. | 0 = none / 2 = suspected / 3 = confirmed serious pathogen |
| Access and site constraints | Gates, narrow beds, steep slopes, or delicate landscaping increase labor and specialty equipment needs. | 0 = easy / 1 = moderate / 2 = difficult / 3 = inaccessible to standard machines |
| Scale and timeline | Multiple stumps or urgent schedule (construction, replanting) change economics and logistics toward a crewed service. | 0 = single / 1 = 2–3 / 3 = 4+ or urgent |
- Decision band: 0–2 points = DIY reasonable; 3–5 = conditional DIY if you have skill and time; 6+ = hire a professional.
- Practical trade-off: hiring a pro costs more upfront but reduces hidden downstream costs — damage to hardscape, trips to the ER, utility repairs, or botched replanting.
- When exceptions apply: a low score with one 3-point item (for example, a small stump right against a foundation) still leans heavily toward professional work.
Concrete example: a 30-inch maple 8 feet from a patio, with roots suspected under a nearby sewer cleanout, scores: size 3, proximity 2, utilities 3, access 1, scale 0 = total 9. This clearly requires professional stump removal and a pre-job utility survey plus a protected work plan.
Judgment people miss: homeowners often equate smaller stumps with low risk. In practice, a small stump can be high risk when it sits under driveways, gas lines, or mature root systems that feed adjacent trees. Size is only one axis; root pathways and site complexity matter more to outcomes.
If your score suggests a pro, insist on an on-site inspection, proof of insurance, and a written scope that specifies grind depth, chip disposal, and responsibilities for any hardscape protection or repairs.
What Professional Contractors Do and How to Evaluate Quotes
Straight fact: a professional stump contractor is selling risk management as much as wood removal. Their value shows up in pre-job planning, protected equipment operation, documented liability coverage, and predictable cleanup that prevents a small job from becoming an expensive repair.
What a competent contractor will actually deliver on site
On-site process, in sequence: a proper crew starts with an inspection and utility locate, defines an explicit scope (grind depth, chip handling, hardscape protection), selects equipment that fits access, executes controlled grinding or excavation, then finishes with chip handling and site restoration. Each step matters because cutting corners on planning or protection is what creates later costs.
| Quote line item | What it should include | Red flag |
|---|---|---|
| Scope and grind depth | Exact depth in inches below grade and whether deeper grinding for replanting is included | Vague language such as will grind to a reasonable depth or grind as needed |
| Chip handling | Specify whether chips are left as mulch, spread on site, hauled away, or screened | No mention of chips or will discuss on the day of service |
| Site protection and restoration | Hardscape protection, turf protection, and backfill or topsoil after grinding when required | Assumes no protective measures or excludes repair of any collateral damage |
| Insurance and permits | Proof of insurance and who obtains permits if local rules require them | Refusal to provide certificates or saying permits are not needed without checking local code |
Practical trade-off: the lowest bid often omits one of the table items. A cheaper crew that leaves chips on-site or refuses to backfill shifts time and cost to you. Spending more up-front for a documented scope with insurance typically reduces total project cost and homeowner hassle.
Concrete example: a homeowner received two quotes for a difficult backyard stump. One quote was substantially lower but excluded chip removal and did not list grind depth. The other was higher on paper, included an 8 inch below-grade grind, chip haul-away, and a damage warranty. The homeowner chose the higher quote and avoided a later bill for hauling and an unplanned patio repair.
- Three contract clauses to insist on: Proof of insurance and a written scope, explicit grind depth and chip disposition, and a clear line for additional work such as deep root cutting or hardscape repair.
- Questions to require answers for: Which machine will you use and how will you protect nearby surfaces, who is responsible for pulling permits, and what is the crew retention plan if the job uncovers disease or utility conflicts.
- Red flag behaviors: Refusal to visit site before quoting, no itemized pricing, or a reluctance to provide local references or insurance documentation.
If a quote looks cheap, check the three items in the checklist first – you are buying certainty and protection, not just a hole in the ground. For more on standards and consumer guidance see Trees Are Good and compare services at stump grinding services.
Aftercare, Restoration, and Replanting Options
Plain fact: what you do after a stump is ground determines whether the spot stabilizes quickly or becomes a maintenance headache. Improper backfill, fresh wood chips left unchecked, or planting too soon are the three common mistakes that produce uneven settling, nutrient problems, and dead plantings.
Immediate restoration (first 48 hours to 2 weeks)
- Inspect the cavity: remove any large root chunks and identify compaction or drainage issues before adding soil.
- Decide on grindings: screen and age chips on-site for later mulch use, or arrange haul-away if you need clean topsoil for planting.
- Backfill in lifts: use 2 to 4 inch layers of screened topsoil mixed with compost and lightly tamp each lift to avoid future settlement.
- Grade and finish: leave the fill slightly proud of surrounding grade (it will settle); cover with seed or sod as your restoration plan requires.
Practical trade-off: keeping grindings saves money and supplies mulch, but fresh chips can immobilize nitrogen and slow turf establishment. If you keep chips, either compost them for several months or add nitrogen-rich amendments and screened topsoil where you will seed or sod.
Soil and compaction detail: compact in controlled lifts rather than driving heavy equipment over the spot. For small lawn repairs, tamping with a hand tamper or rolling lightly is sufficient; for areas that will bear loads or turf, plan to check and top-dress the spot after the first winter when additional settling is predictable.
Timing and rules for replanting
Timing rules of thumb: if you ground only to lawn depth and backfilled with quality topsoil, you can seed or lay sod within a few days. If the grind was deeper to accommodate a new tree or major root removal, wait until the backfill has settled and you have tested/looked for root conflicts – typically a couple of months. For new tree planting, avoid placing the root flare below the finished grade of the surrounding soil.
When to avoid replanting the same species: if the original tree had a confirmed disease or pest infestation, do not replant the same species in that spot without an arborist assessment. Soil tests for pH and compaction will often steer species choice; call for arborist advice via arborist consulting when you suspect disease or hidden root damage.
Root management options: install shallow root barriers when rebuilding near patios or utilities, or choose shallow-rooting ornamental species to reduce future conflicts. If large roots remain and you plan a heavy planting, consider targeted root pruning by a professional to shape the rooting zone before planting.
Real-world example: a homeowner had a 30-inch stump ground to 10 inches below grade, kept the screened chips in a compost pile, and backfilled with a 70/30 mix of screened topsoil and compost in 3-inch lifts. They seeded the lawn 10 days later; after two winters they topped the settled spot with a thin layer of topsoil and reseeded patches. Because the homeowner avoided fresh chips in the seed bed and compacted the lifts carefully, the area required only minor touch-ups rather than a full redo.
Next consideration: choose between hauling grindings or using them on-site, then schedule replanting based on grind depth and whether you need an arborist soil assessment.
0 Comments