

Tree and stump removal is one of the few home projects that combines heavy equipment, safety risk, and local permitting into a single job. This guide gives realistic cost ranges and example scenarios, a step-by-step timeline for simple and complex jobs, the questions professionals use to assess work, and the permits and insurance you should expect. Read on for practical advice on vetting contractors, choosing between stump grinding and full excavation, and short-term landscape options after a removal.
Difference Between Tree Removal and Stump Removal
Clear distinction: Tree removal is the cutting, sectional dismantling, and hauling away of the above-ground portion of a tree. Stump removal is a separate task that deals with the remaining trunk butt and root collar — what is left after the tree is cut down.
Two fundamentally different objectives: Removing a tree solves hazard, canopy, or nuisance problems above ground. Removing a stump solves ground-level issues: tripping hazards, replanting, root regrowth, or disease containment. Treat the two as linked but independent line items when you get estimates.
Stump grinding versus stump excavation
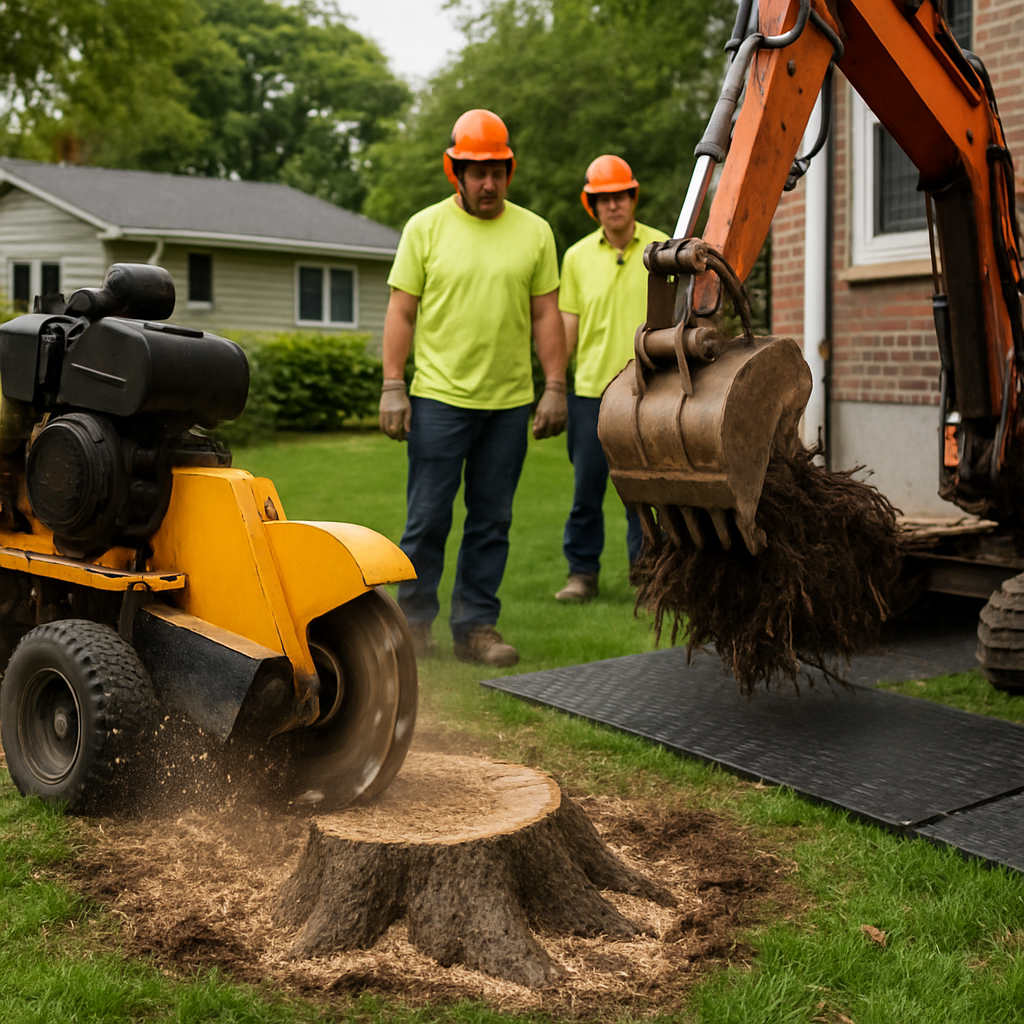
Stump grinding: a rotating cutter wheel on a dedicated grinder chips the stump down to a specified depth, leaving the main root system in place to decay. Equipment used includes purpose-built stump grinders and chippers; cleanup is chips and fill. Stump excavation: an excavator or backhoe removes the entire stump and large roots from the soil, leaving a much larger hole that needs backfill and grading.
- When grinding is appropriate: fast, lower-cost, minimal turf disturbance; good for most lawns and when you plan to replant nearby after some settling.
- When excavation is necessary: confirmed root disease, invasive root systems near foundations or septic lines, or when you need absolute root removal for new construction or landscaping.
- Tradeoff to expect: grinding is less disruptive but leaves roots that rot and sometimes sprout; excavation is definitive but expensive and will require soil remediation.
Concrete example: A 24-inch oak stump sitting in the center of a lawn is typically handled by stump grinding — it minimizes turf damage and returns usable mulch. By contrast, an ash stump with root-rot symptoms within 6 feet of a foundation usually calls for excavation to remove diseased roots and prevent structural spread.
Practical judgment: homeowners often underestimate the impact of residual roots. If you want to plant a new tree in the exact same spot quickly, grinding alone may be insufficient because large roots can impede planting depth and compete with a young tree. In those cases plan for targeted root removal or full excavation.
Misused fixes to avoid: chemical stump removers and salt treatments are slow, environmentally unfriendly, and inappropriate near irrigation or vegetable beds. They are a false economy compared with mechanical grinding or proper excavation handled by a licensed crew or certified arborist.
Next consideration: decide whether you prioritize time, turf preservation, or absolute root removal — that single choice determines equipment, cost, and how much follow-up grading or soil work you'll need.
How Professionals Assess a Tree and Stump
Practical reality: professionals size up a job by three questions first: how unstable is the tree, how will crews reach and remove it, and what will disposal look like. Assessments are not aesthetic; they are about controlling risk, time, and cost on the day of work.
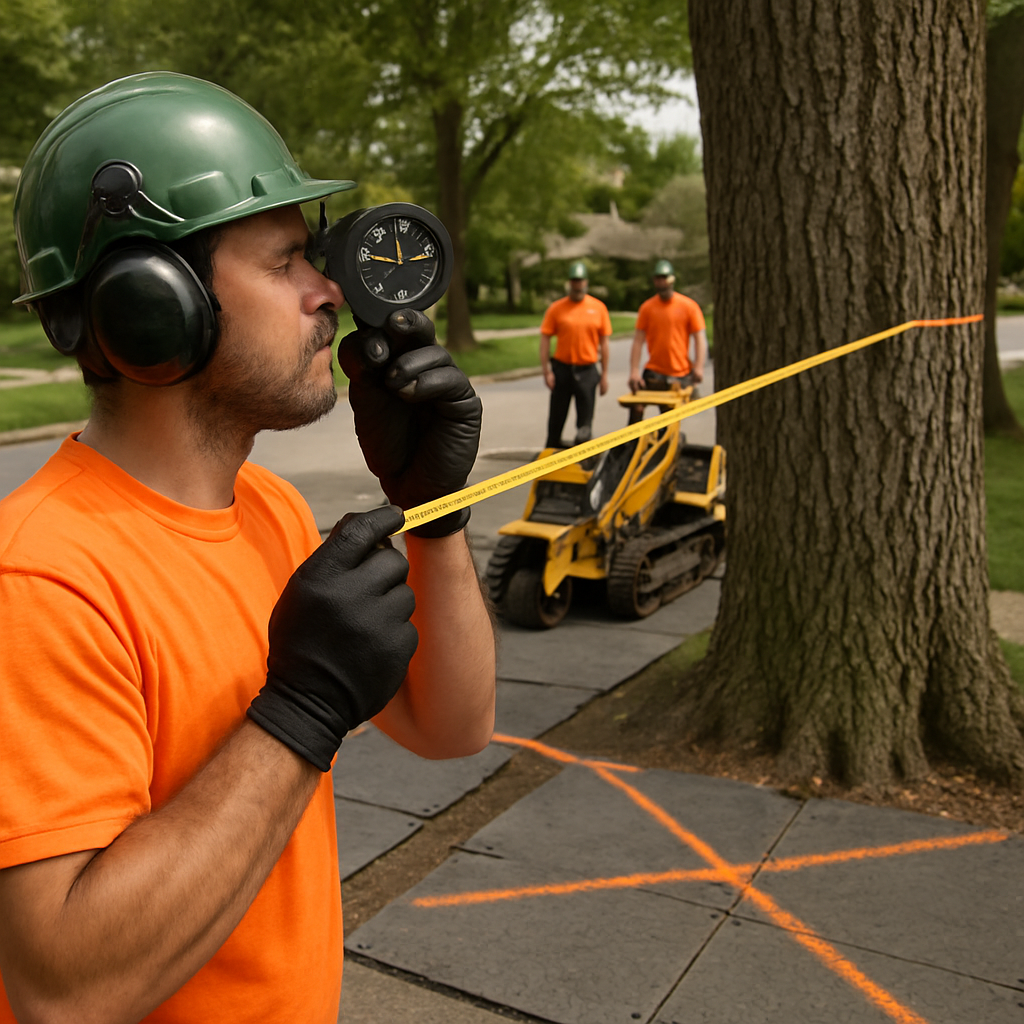
What they measure: crews take concrete measurements and observations that drive the method and price. Expect trunk diameter measured at 4.5 feet (DBH), tree height (laser rangefinder or clinometer), degree of lean, crown dieback percentage, visible decay or fungal conks, and the presence of cavities or cracks. For stumps they note stump diameter at ground level, root flare visibility, and signs of root disease or sinkage.
Field checks that change the plan
- Structural test: sounding the trunk and probing cavities to detect hidden hollows that require sectional dismantling instead of felling
- Root inspection: digging small test probes around the root flare to look for rot or heave that can make stump grinding ineffective and force excavation
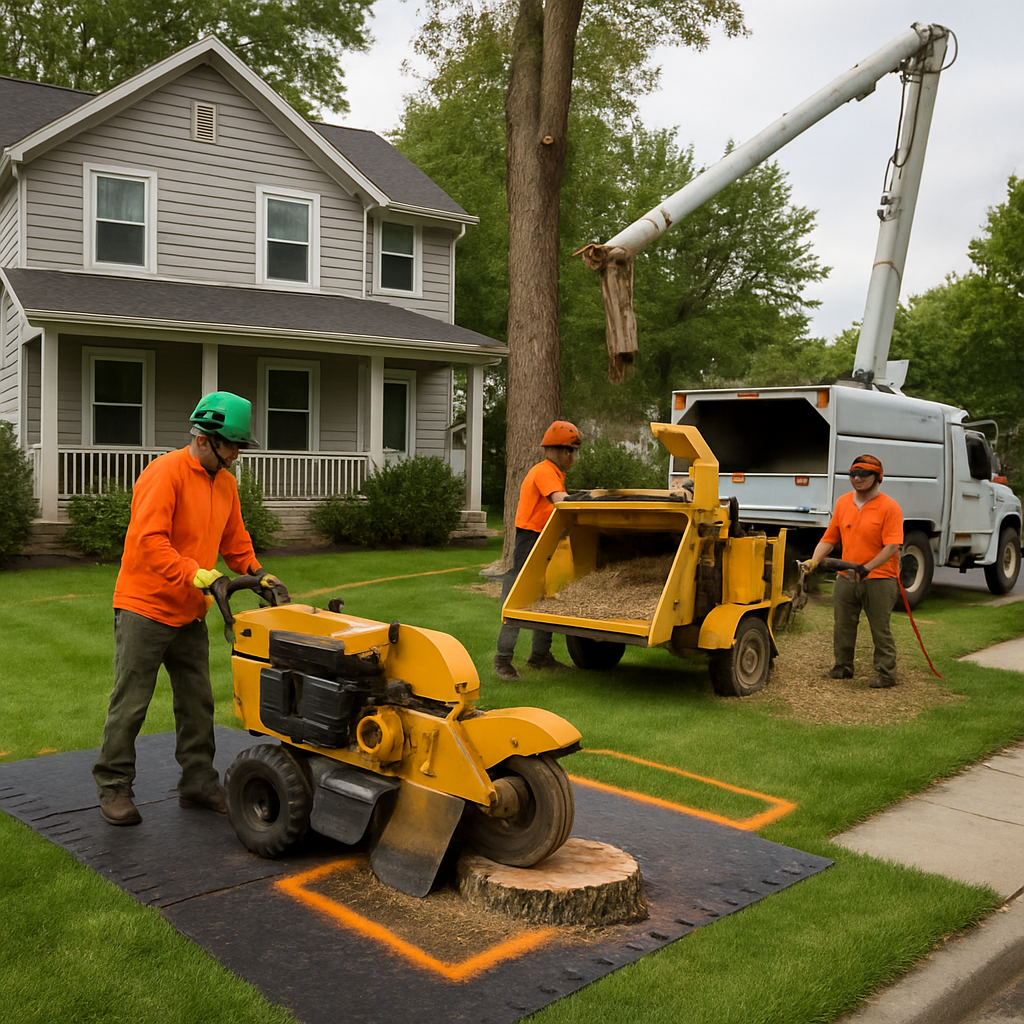
- Access and drop zone mapping: plotting where limbs and logs will land, where trucks will park, and whether protective mats are needed for turf or driveway
- Utility and obstruction scan: locating overhead power lines, underground utilities (811), fences, and septic fields that change equipment choices and permit needs
- Logistics check: evaluating neighbor access, narrow streets, and disposal options because hauling constraints often add labor and time
Practical insight: a photo-based quote can be useful for budgeting, but real-world variables — tight lateral access, hidden decay, or a root plate undermined by turf — routinely change the price by 30 percent or more. Insist on an on-site inspection for any tree within two tree lengths of a structure or near utilities.
Trade-off to expect: when a stump shows mycelial fans or conks, grinding is faster and cheaper but leaves infected roots in place; excavation removes the disease source but increases cost, turf damage, and backfill work. The crew will recommend a path based on your priority: speed and minimal lawn impact, or long-term remediation.
Concrete example: a 50-foot maple with a 30-inch DBH leaning toward a house will trigger a different plan than a similar tree in an open lot. On inspection, a pro will mark the fall zone, document cavities with photos, measure for a bucket truck reach, and likely propose sectional removal using rigging and an aerial lift. That choice adds a second crew and safety rigging time — typically a half- to full-day premium over a simple fell-and-chip job.
What contractors will ask from you: clear photos showing the full tree, trunk base, nearby structures, driveway access, and street approach; permission for an on-site visit; and confirmation that underground locates (811) are allowed. Providing those up front speeds an accurate quote.
If a contractor skips a physical root inspection or avoids documenting access and rigging needs, treat their low estimate as likely incomplete.
Cost Breakdown and Example Pricing Scenarios
Direct point: Professional pricing for tree and stump removal is built from modular line items — equipment, crew hours, access logistics, disposal, permits, and any specialty rigging — not a single flat number. Ask for an itemized estimate up front so you can see which choices change the price and why.
Primary cost drivers: Height and DBH (diameter at breast height) set base labor; species and wood density affect cutting time; access and drop-zone constraints determine whether a bucket truck or crane is needed; stump method (grind versus excavate) and disposal distance add discrete fees; emergency or life-safety jobs carry urgent-scheduling premiums.
| Line item | Typical cost (example: 25 ft suburban pine) |
|---|---|
| Labor (fell, limb, chip) | $150 – $250 |
| Equipment and mobilization (chipper, grinder) | $50 – $100 |
| Stump grinding (18 inch diameter, good access) | $100 – $200 |
| Haul and disposal (chip removal) | $25 – $50 |
| Permit / 811 locate | $0 – $25 |
| Estimated total | $325 – $625 |
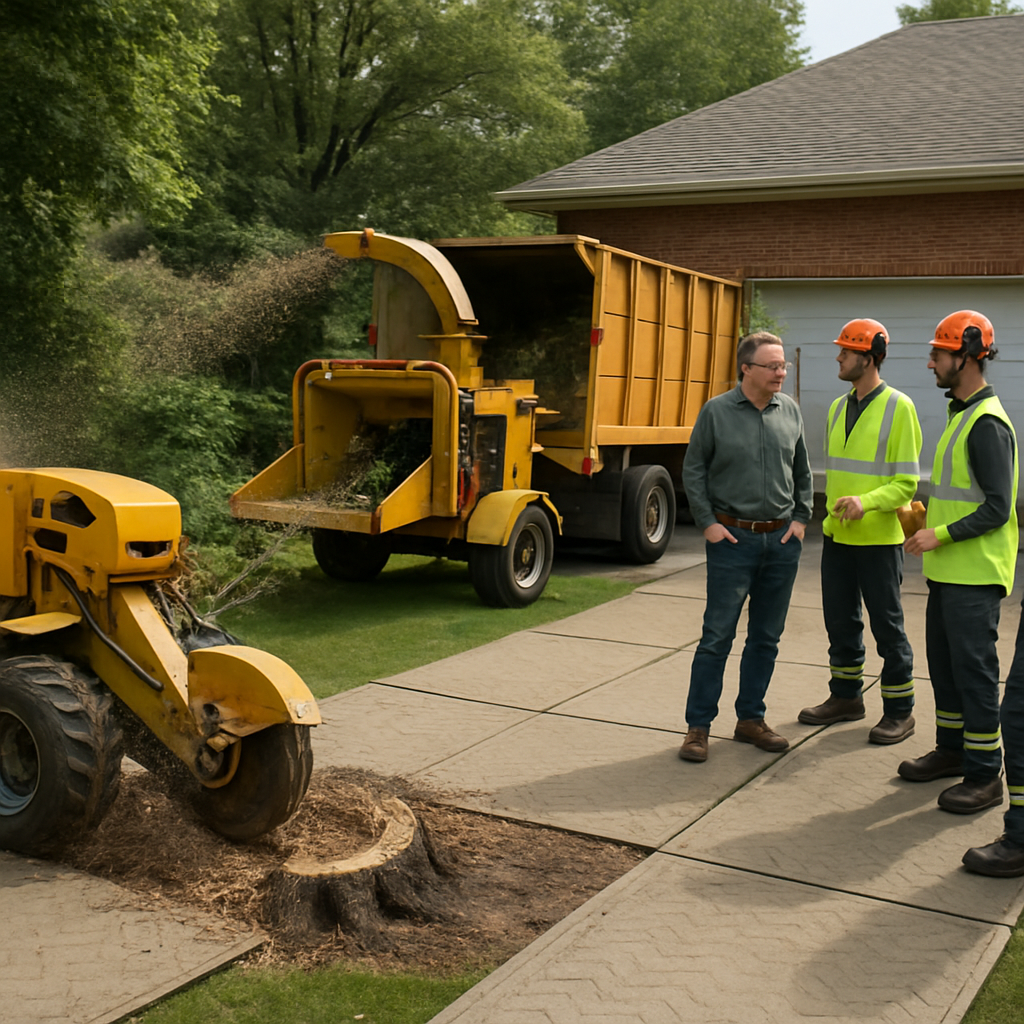
Concrete example: A 25-foot pine in a typical suburban backyard with driveway access is often handled in a half-day by a two-person crew using a chipper and stump grinder. With disposal included, expect the itemized components above to produce an estimate in the mid-hundreds; if access is tighter or the stump is larger, that same job jumps quickly because labor time and rigging change.
Higher-complexity scenario: A 60-foot oak leaning toward a house frequently requires sectional dismantling, a bucket truck or crane, and a larger crew for rigging — contractors commonly price those jobs in the low thousands because each additional piece of equipment and extra crew hour compounds cost. Expect permit review, possible utility coordination, and longer on-site time; budget for crane rental windows and temporary traffic control if streets are narrow.
Practical trade-off: Stump grinding is cheaper and less disruptive but often leaves major roots that will rot over months and can interfere with immediate replanting. Full stump excavation removes roots now so you can build or plant immediately, but it doubles or triples turf repair and soil remediation costs. Choose based on your timeline and tolerance for follow-up landscaping work.
Next consideration: when you request estimates, insist on a written breakdown that separates tree removal, stump work, disposal, permits, and any emergency surcharges so you can compare apples to apples.
Timeline: What to Expect Before, During, and After the Job
Scheduling sets the pace. For tree and stump removal the calendar, permit windows, and utility coordination usually determine when work happens more than crew availability. Plan around those constraints early or you will be forced into a rushed, higher-cost job.
Before the crew arrives – what you should start now
Start-up actions. Submit permit applications if required, request an 811 underground utility locate, clear vehicles and valuables from the work area, and confirm any driveway or turf protection the contractor will use. Contractors often require a small deposit to reserve a slot – expect that when booking during busy seasons.
Coordination trade-off. Speed versus thoroughness: accelerating a job usually means paying an emergency premium and accepting more disruption to the yard. If you can wait, allow the contractor time to secure permits and utility windows; that reduces risk and often the total cost.
Day of work – the practical sequence
- Arrival and briefing: crew does a site walk, marks drop zones, and reviews any permit or utility constraints with you.
- Protect and stage: protective mats, cones, and traffic control go down before heavy equipment moves in.
- Cutting strategy: crews choose sectional dismantle or controlled felling depending on access and risk; this choice drives time and crew size.
- Processing and removal: branches go to the chipper, trunk sections are cut and loaded, and stumps are either ground or excavated per the estimate.
- Cleanup and inspection: final chip distribution or haul-off, surface raking, and a joint walkthrough to sign off and note any punch-list items.
Weather and sequencing. Rain, high wind, or frozen ground change the sequence and may pause work. Expect a crew to reschedule rather than proceed in unsafe conditions; that is inconvenient but preferable to property damage or an incident.
After the job – short and medium term expectations
Immediate closeout. Expect a chip pile or clean haul-away, a small rut or low spot where the stump was, and a final invoice with any change orders documented. Contractors should not request final payment until you have completed the walkthrough and any agreed punch-list items are noted.
Site recovery timeline. Ground left after grinding settles and may need topsoil, tamping, and sod within weeks. Root decay is slower – large roots can persist structurally for months and interfere with immediate deep replanting. If you need to plant a large replacement tree, plan for targeted root removal or wait for roots to break down to avoid poor establishment.
Practical judgment. Leaving chips on site is often cheaper and benefits soil structure, but if the removed tree had disease you should insist on hauling chips away. Do not assume chip reuse is appropriate without confirming the tree health with the contractor or a certified arborist.
Concrete example: A homeowner schedules removal of a 40-foot maple near a driveway. The contractor does a same-week photo review, books an on-site inspection within 48 to 72 hours, secures a permit which takes about 10 to 21 days in this jurisdiction, and schedules the physical work for the next available slot. The crew completes removal and stump grinding in a single workday, leaves a chip pile for the homeowner to reuse, and returns within a week to address a small grading spot noted on the walkthrough.
Next consideration: lock in permit and utility coordination first. That schedule is the single biggest determinant of when the work will actually take place.
For a precise on-site timeline and to review permit requirements, request an expert assessment from a certified arborist via arborist services.
Permits, Regulations, Insurance, and Utility Coordination
Hard requirement: permits, local regulations, contractor insurance, and utility coordination are not optional details to be deferred until the day of work. These four items determine whether a quoted job can proceed on schedule, whether the contractor can legally perform the work, and who pays if something goes wrong.
When permits are required: many municipalities require permits for street trees, trees above specific diameters, or protected species and historic-designated trees. Actionable step: search your city or county code online, or have a certified arborist prepare the short report usually required with permit applications. For permit help see arborist services.
- Permit workflow: collect tree photos and DBH, submit application and any arborist report, pay fee, and await approval or site inspection. Timelines vary widely – expect from a few days to several weeks depending on jurisdiction and whether a public right of way is involved.
- Permit traps to watch for: emergency exemptions are narrow; post-storm removal still often needs notification or inspection for protected trees; local historical or HOA rules can add steps and fines if skipped.
Insurance to verify: require a current certificate of insurance showing at minimum $1,000,000 general liability per occurrence, commercial auto, and workers compensation. Ask for the insurer name, policy number, and expiration date and request an additional insured endorsement and waiver of subrogation for your property when available. For large commercial or public projects insist on bonding or a performance bond.
Utility coordination responsibilities: call 811 for underground locates before any digging or stump excavation and get the ticket number on file. For overhead lines coordinate with the utility company – a line crew may need to de-energize or set protective measures, and that window can add cost and scheduling lag. Contractors should document those requests and any utility work orders.
Practical trade-off: accelerating a job by skipping proper utility windows or permits is a false saving. Fast scheduling often means emergency crew premiums and higher liability exposure. Pay for the coordination up front to avoid stop-work orders, fines, or an incident that leaves you responsible for damages.
Concrete example: A 70-foot pine leaning toward a primary distribution line will require an 811 locate, a utility company window to allow safe cutting near conductors, and often a city permit because the tree overhangs the street. Expect the utility coordination and permit approvals to add two to three weeks to the calendar and a separate line-item on the estimate for utility crew charges or a licensed line-clearance subcontractor.
What to collect before work starts: permit paperwork, the 811 ticket number, a contractor certificate of insurance with policy details, any utility work orders, and an arborist recommendation if the tree is protected or disease-suspect. Keep these in one folder for claims or warranty discussions.
Risks, Safety, and How to Choose a Contractor
Clear reality: most cost overruns, property damage, and injuries on tree jobs come from poor planning and weak contractor controls, not from unforeseeable accidents. Treat the selection process as the primary safety step — the crew you hire determines whether the job is engineered or improvised.
Key risk categories and practical controls
People risk (crew safety): expect a written, site-specific safety plan that names the competent person on site, describes fall-protection and rescue procedures, and lists required PPE. If a crew cannot produce that, assume their practices are informal and avoid hiring them.
Property and utilities: demand documented plans for fall zones, rigging points, and how overhead or underground utilities will be managed. Cheap shortcuts here produce the most expensive outcomes – damaged roofs, snapped service lines, and long insurance fights.
Environmental and long-term risk: a low-cost stump grind that leaves major roots or infected wood can cause regrowth, soil pathogens, or future infrastructure problems. If long-term remediation matters to you, budget for excavation or an arborist-directed root treatment.
How to verify competence without being an expert
- Ask for a site-specific method statement: not a generic brochure. A competent contractor will outline the sequence, equipment, exclusion zones, and contingency actions for your particular property.
- Request proof of current coverage: have them email a certificate of insurance that lists limits and policy dates; call the insurer to confirm. Do not accept verbal assurances.
- Get evidence of relevant experience: ask for photos of completed jobs with similar constraints (large tree near structure, tight alley access, crane lifts) and two recent references you can call.
Practical trade-off: a smaller, local crew can be perfectly competent for standard stump grinding in an open yard, but complex jobs near lines or structures need an ISA-certified arborist and crews with specialized rigging and crane experience. Paying more up front often avoids 10 times the remediation cost later.
Concrete example: a homeowner hired the lowest bidder for a sectional removal. The crew cut a limb that shifted unexpectedly, cracking nearby siding. The contractor lacked a written change-order process and insurance verification delayed repairs for months. The outcome cost the homeowner more than the savings from the low bid and required legal back-and-forth to settle claims.
Questions to ask on the first phone call and what a good answer sounds like
- Can you provide a site-specific safety plan and a COI before the visit? Good answer: yes, we will email both and the COI names our insurer and policy number.
- Who will perform the risk assessment on site? Good answer: an ISA-certified arborist or a foreman with documented training who will produce a written method statement.
- How do you handle change orders and final payment? Good answer: we document changes on site, you approve the cost, and we hold a small retainage until punch-list items are closed.
Red flags to walk away from: the contractor refuses a site visit yet gives a firm total, asks for full cash up front, cannot or will not provide current insurer details, or minimizes permits and utility locates as optional. Those behaviors predict problems on-site.
Final judgment: hire for documented process and documented accountability, not for the lowest price. For anything near structures, utilities, or within the public right-of-way, require an ISA-certified assessment and written utility coordination. To start the contractor check and request an on-site risk evaluation, see Mr Tree tree removal or book an arborist assessment.
Post-Removal Options and Site Restoration
Immediate priority: decide whether you want the footprint cleared for replanting, hardscape, or to leave as naturalized ground. That single choice drives whether you need additional root removal, soil remediation, compaction work, or permit updates — and it is the most common decision homeowners get wrong by treating stump work as the final step.
Practical restoration pathways
Lawn repair and light replanting: keep the grind depth shallow-to-moderate, bring in topsoil to level the depression, and sod or seed after settling. Trade-off: this is fastest and cheapest, but large roots remain and will rot over months, causing low spots or future heaving.
Immediate same-spot replacement: if you want a replacement tree or a structure exactly where the stump was, opt for targeted root excavation and removal of the root plate. Consequence: excavation raises cost and requires substantial backfill, compaction control, and a waiting period so the new planting can establish in uncompacted soil rather than in a cavity filled with coarse wood chips.
Hardscape or patio installation: full stump and major-root excavation plus engineered base compaction are non-negotiable. Leaving large roots under a patio invites settling and cracking. Also confirm local drainage rules and any required stormwater permits before you compact the site into an impermeable surface.
- Site sanitation: remove chips from diseased trees; do not reuse on planting beds without composting.
- Soil handling: replace or blend the top 8 to 18 inches of soil where the root mass was to avoid planting in raw wood-mulch pockets.
- Irrigation check: reroute or cap sprinkler heads that intersect the former root plate.
Reality check: homeowners often assume chips are inert mulch you can plant into the same week. In practice, fresh grindings immobilize nitrogen and create voids; successful replanting usually requires replacing wood-rich fill with quality topsoil or waiting at least one growing season for significant decomposition.
Real-world use case: A homeowner cleared a 30-inch stump and intended to plant a shade maple that autumn. The crew ground the stump but left major lateral roots. Without targeted root removal and topsoil replacement, the new maple showed poor root development the next spring and required replanting. The correct sequence would have been stump excavation, backfill with clean topsoil, and planting the following dormant season.
When to call a pro: ask for a certified arborist evaluation when disease was present, when utilities run through the root zone, or when you plan structural work (patio, pool, foundation repair). An arborist will recommend whether grinding suffices or if full root extraction and soil remediation are necessary — and can document recommendations for permit use.
If the removed tree showed signs of disease, insist on chip haul-away and an arborist report before reuse; reusing infected wood chips spreads pathogens.
Next consideration: pick the restoration path based on what you plan to do on the spot next. If you prioritize speed and low cost, accept residual roots and occasional regrading; if you prioritize a foundation for new planting or hardscape, budget for excavation, engineered fill, and professional oversight.
0 Comments