

Leftover stumps are more than an eyesore – they complicate replanting, lawn care, and property use, and choosing the right stump removal services matters. This guide cuts through the options you will be offered — stump grinding, full extraction, chemical and natural methods — and gives realistic price ranges plus a step-by-step yard preparation checklist to lower costs and risks. Read on for contractor questions, aftercare tips, and practical examples so you can pick a safe, cost-effective solution for your property.
Overview of Stump Removal Options
Straight answer: there are five practical paths contractors will offer: stump grinding, full stump extraction, chemical decomposition, controlled burning, and natural decay. Each solves different problems—grinding clears surface wood quickly, extraction removes roots for construction or replanting, chemicals and natural methods take time and carry trade-offs, and burning is rarely appropriate in suburban yards.
How to pick a method that fits the job
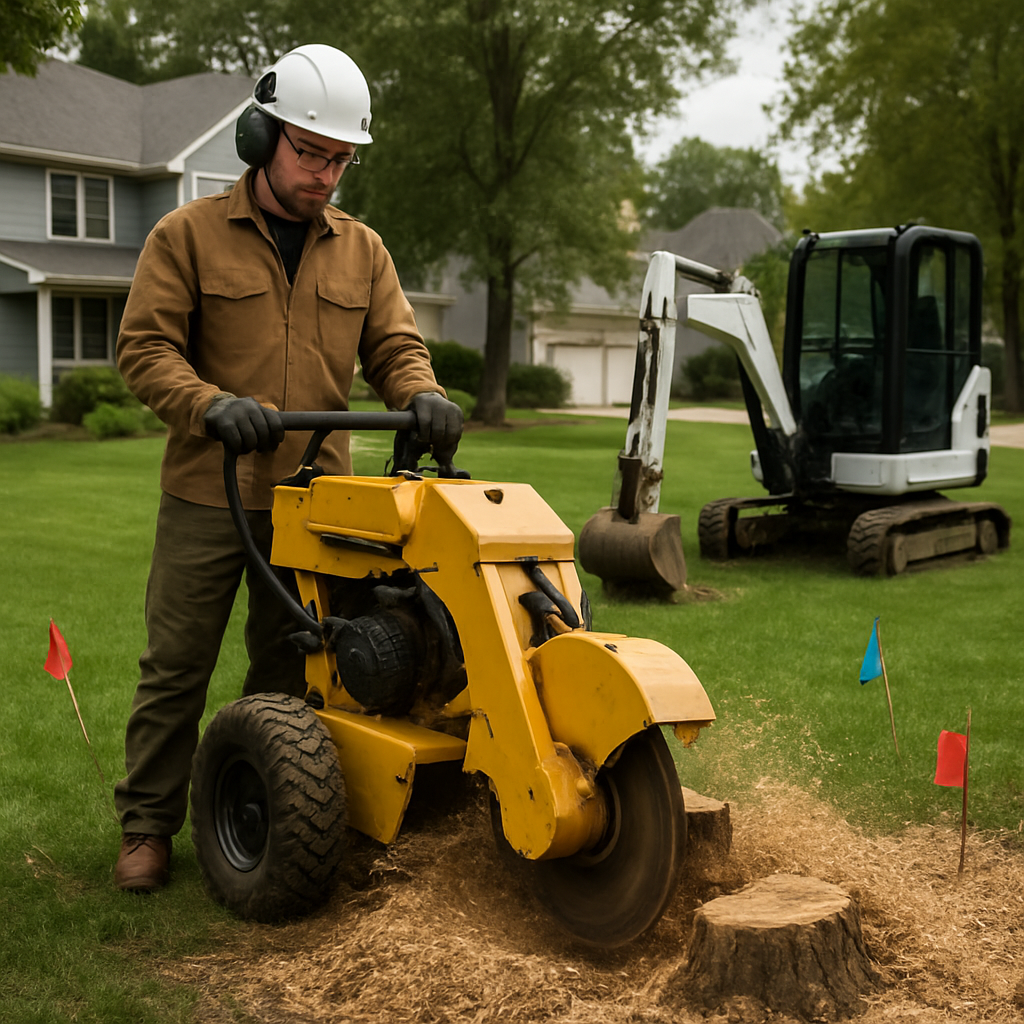
Stump grinding: This is the go-to for most homeowners because it is fast and preserves the surrounding lawn. Contractors use machines like the Vermeer SC252 or tracked grinders for tight access; the grinder removes the trunk and part of the root collar, leaving a shallow cavity you backfill. Practical limitation: roots remain in place and can resprout on certain species, so grinding is not the right choice if you need every root removed for new construction or a large replanted tree. See our stump grinding page for service details.
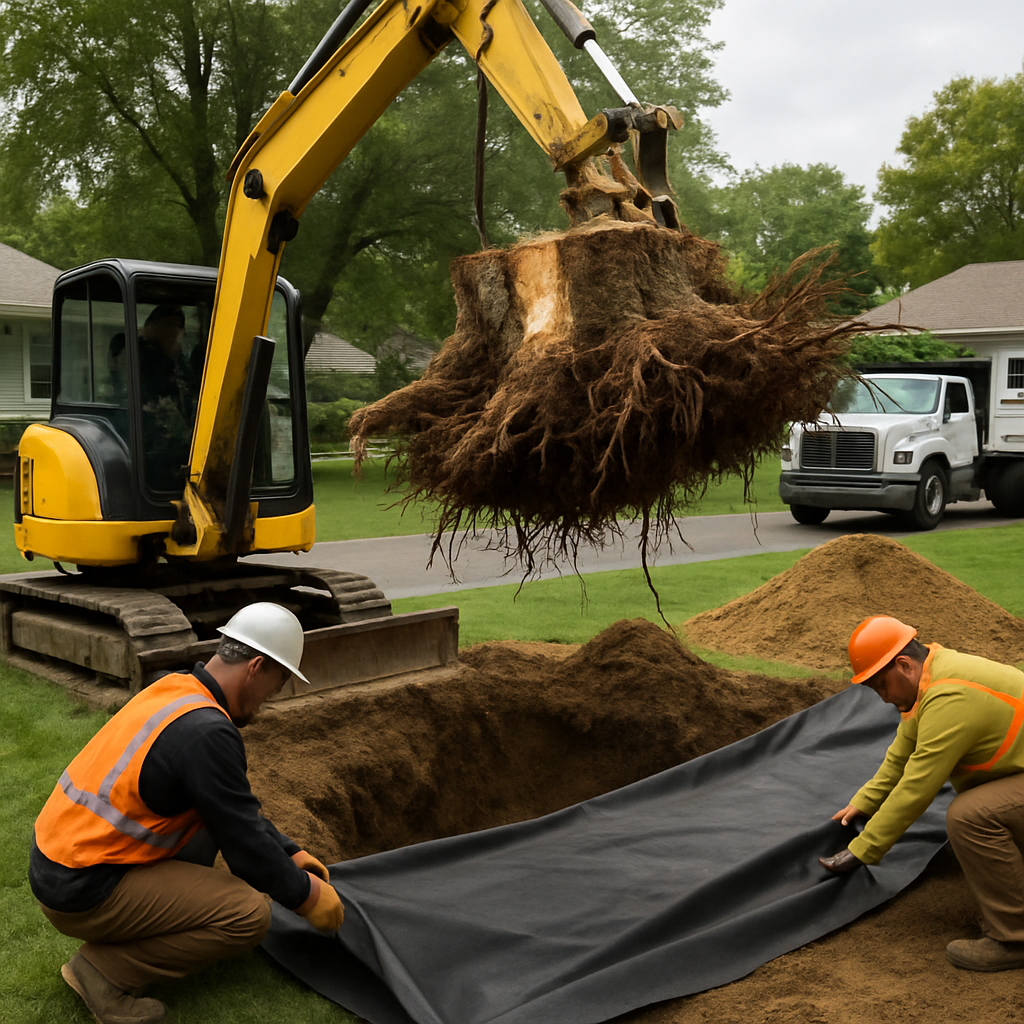
Full stump extraction: Use a backhoe or mechanical root ball digger when roots must be removed entirely. This is the right move before building, installing a septic field, or when root systems are damaging foundations. The trade-off is clear: extraction is more expensive, tears up the site, and requires backfilling and compaction work afterward. In practice, reputable crews only recommend extraction after an on-site inspection because repairs and soil remediation add time and cost.
- Chemical decomposition: Works slowly over months to years; useful when you can wait and want minimal equipment. Consideration: chemicals can harm nearby plants and are inappropriate near vegetable gardens.
- Controlled burning: Sometimes effective but heavily regulated; most contractors avoid it in developed neighborhoods because of permits, smoke, and fire risk.
- Natural decay and accelerated rot: Cheap and low-impact if you have patience; you can speed it up with wood chips and nitrogen-rich fertilizer, but expect months to years.
Alternative approaches worth knowing: forestry mulching or land clearing services can grind or mulch many stumps quickly when clearing acreage, and renters often use heavy-duty stump grinder rental or wood chipper rental for small projects. Real-world judgment: for single residential stumps, hiring a pro to grind is usually cheaper and safer than renting equipment unless you have prior experience.
Concrete example: A homeowner prepping for a backyard pool discovered a 30-inch oak stump in the planned footprint. Mr Tree Inc. recommended full extraction because roots reached the pool pad area; the crew used a mini-excavator, removed the root ball, and backfilled with compacted lifts to avoid future settling. The result delayed planting but removed the risk of roots heaving the pool edge.
Important: call 811 to mark utilities before any grinding or digging. Tree stumps can hide hazards in tall grass and create tripping or mower-damaging dangers, as noted by Family Handyman.
Stump Grinding: Process, Equipment, and Pros and Cons
Stump grinding is the pragmatic default when you want the visible wood removed quickly with the least landscape disturbance. It chews the trunk and the root crown into chips, leaving the major root structure in place, which is both its strength and its limitation.
How the on-site process actually happens
A qualified crew positions a grinder over the stump and uses a high-speed, carbide-tooth cutting wheel to plane the stump down below grade. Operators work in passes from the outer edge to the center, then lower the wheel and repeat until they hit the agreed depth — commonly somewhere between 4 and 12 inches below grade depending on your needs. The result is a crater of compacted wood chips you backfill and level for sod or planting.
Equipment choice changes the outcome. Contractor-class, track-mounted grinders with 30+ horsepower handle large hardwoods and slope work; tow-behind or smaller walk-behind machines are fine for multiple small stumps or rental use but slow down quickly on big trunks. Models like Rayco RG80 are examples of machines pros use for heavy work, while rental units trade speed for affordability.
- Pros — Why professionals recommend grinding: Fast turnaround for most residential jobs; minimal soil upheaval compared with excavation; grindings are reusable as mulch on site; crews can usually complete multiple stumps in a day under good access.
- Cons — What grinding will not do: Significant lateral roots remain and can continue to rot or sprout; not a substitute when you need the entire root system out for construction; deeper grinding to remove more roots raises time and price.
- Operational trade-off: Requesting deeper grind depths or tight access work (terraces, near foundations) increases labor and risk; expect crews to charge more for precision work compared with open-lawn jobs.
Concrete example: A homeowner with an 18-inch maple stump in a front yard hired Mr Tree Inc. for grinding to 8 inches below grade using a mid-sized tracked grinder. The crew left the chip crater, backfilled with screened topsoil, and the homeowner sodded the area 10 days later. Two small suckers emerged the following spring and were removed during a scheduled follow-up — a common, manageable outcome with aggressive species.
Practical insight: Grinding is cost-effective and fast, but treat it as a surface solution; if you plan heavy structures or to replant a large tree in the exact footprint, plan for extraction instead.
Full Stump Extraction and Excavation: When It Makes Sense
Direct point: Full stump extraction is the right tool when roots are a structural or functional problem, not when you merely want the yard tidied. Extraction solves load-bearing, utility, and invasive-root problems at the cost of surface destruction and extra site work.
When extraction is the practical solution
- Construction or heavy loads: Remove stumps and major lateral roots when you plan foundations, driveways, or a pool in the same footprint; otherwise settling and rot pockets will compromise the new work.
- Active structural damage: Choose extraction if roots are already undermining patios, sidewalks, or septic components rather than relying on grinding as a band-aid.
- Invasive or resprouting species: Extraction is the only reliable option for aggressive species where root fragments will otherwise resprout and spread.
- Confined-space access with vertical obstacles: When roots are entangled under hardscapes or utilities and cutting them back would destabilize those structures.
Practical trade-off: Expect more upfront cost and a need for engineered restoration. Excavation removes the problem below grade, but it leaves a pit that must be backfilled in compacted lifts or replaced with engineered fill to avoid settling. That remediation often costs as much as the dig itself.
Limitation to plan for: Heavy soils, bedrock, high groundwater, or limited street access change a simple extraction into a multi-day operation with dewatering, traffic control, or crane lifts. Contractors price for risk; low bids that ignore these constraints are a red flag.
Concrete example: A homeowner replacing a failing retaining wall discovered a 36-inch sugar maple stump with roots behind the wall. Mr Tree Inc. used a mini-excavator to remove the stump and the major lateral roots, installed geotextile fabric, and backfilled with compacted engineered fill. The crew hauled the stump to a green-waste facility and left a stable base so the mason could rebuild the wall without future root heave.
Extra services to consider during extraction: Pair removal with root barrier installation where roots threatened adjacent structures, or request staged compaction tests if you plan heavy construction. Ask the contractor whether they will remove the entire root mass or cut larger roots and treat the remaining root plate.
Extraction fixes root problems permanently but creates a restoration problem that must be specified in the contract. If you need the ground ready for building, demand a written backfill and compaction plan.
Chemical, Burning, and Natural Decomposition Methods and Risks
Short answer: chemical killers, controlled burning, and natural decay are all slower, niche options that trade immediate cleanup for lower equipment needs or lower cost — and each brings a predictable set of limitations you must accept before choosing them.
How each method actually performs on a typical yard
Chemical treatments: Commercial stump-killer granules or liquids (potassium nitrate is a common ingredient) accelerate rot by desiccating the wood and boosting microbial activity. Practical limitation: you are converting the stump into brittle, decomposing wood and salts that can raise local soil salinity, so nearby flower beds or vegetable gardens may suffer and replanting timelines are unpredictable. Expect months to over a year for a large stump to break down enough to be removed easily.
Controlled burning: In places where it is allowed, burning can reduce the visible trunk quickly, but it rarely eliminates deeper roots. Burn pits create uneven, heat-sterilized soil and significant smoke and ember risk. Insurers and contractors often refuse liability for burns in suburban settings, and local fire code and air quality rules frequently forbid the practice.
Natural decomposition and acceleration techniques: Stacking wood chips, keeping the stump moist, and adding nitrogen-rich material will speed decay without chemicals. This is low cost and low impact, but it is a slow choice. If you need the footprint available for construction, heavy planting, or immediate lawn use, natural decay is a bad fit.
- When to consider chemicals: remote locations, metallic or paved access prevents grinders, and you can wait several months; understand that roots usually remain.
- When burning makes sense: rural acreage with required permits and professional oversight, when no nearby structures or smoke-sensitive neighbors exist.
- When natural decay is acceptable: informal lawn areas or large properties where you plan no near-term construction and can tolerate stump presence for years.
Trade-off to be honest about: these methods shift cost and risk rather than remove them. Chemical and natural approaches often lead to a follow-up grinding or extraction later, which means wasted time and possibly higher cumulative cost. Burning can create ground conditions that complicate future grading or planting.
Concrete example: A homeowner tried a labelled stump-killer on a 20-inch maple and left the treated stump for nine months. Decomposition made the trunk brittle but left a substantial root mass; Mr Tree Inc. was then called to grind the remaining material to 8 inches below grade and backfill, which took less time than an untreated, fully intact stump would have required but still required professional equipment.
Practical judgment: For most suburban yards, chemical or burning options are false economies. If you want the area usable within a year or need roots gone for construction, budget for grinding or extraction up front rather than banking on uncertain decay.
Realistic Pricing: Typical Cost Ranges and What Raises or Lowers Estimates
Bottom line: most residential jobs fall into predictable bands, but the final invoice depends more on access, scope, and disposal than stump diameter alone.
Typical price bands (real-world ranges)
| Stump diameter | Typical stump grinding range | Typical full-extraction range |
|---|---|---|
| Under 12 inches | $75 to $150 | $300 to $600 |
| 12 to 24 inches | $125 to $275 | $500 to $900 |
| 24 to 36 inches | $200 to $400 | $800 to $1,500 |
| Over 36 inches | $400+ (depends on species and depth) | $1,500+ (complex access or engineered backfill adds cost) |
Key cost insight: contractors quote by a combination of stump size and practical job friction. A 20-inch stump in an open lawn costs far less than a 16-inch stump tucked behind a shed made of concrete.
What pushes estimates up
- Access and equipment staging: narrow gates, stairs, or street-parking restrictions often require smaller machines, hand work, or extra labor time and therefore higher charges.
- Number and distribution of stumps: multiple stumps clustered together usually lower per-stump cost; scattered stumps create more setup and teardown time.
- Soil, slope, and subsurface obstacles: rocky soil, high water table, buried concrete, or utility congestion converts a routine grind into a partial excavation or multi-day job.
- Disposal and permit costs: hauling to a green-waste facility, tipping fees, or required permits (for burning or excavation in some jurisdictions) are added line items.
- Requested grind depth and follow-up work: deeper grinding, root grinding near foundations, or backfill/compaction services add labor and materials.
What can lower the estimate: clear, direct machine access, grouping multiple stumps into one visit, scheduling during normal business hours (avoid emergency or weekend call-out fees), and doing simple prep work yourself like removing lawn furniture or marking irrigation heads.
Practical trade-off: the lowest bid often excludes haul-off, deep grinding, or site restoration. In practice, paying 15 to 25 percent more for an inclusive, written scope frequently ends up cheaper than a low bid plus unplanned add-ons.
Concrete example: Mr Tree Inc. quoted a homeowner $1,050 to extract three 10–18 inch stumps that sat behind a detached garage. The high-access path forced use of a mini-excavator and two crew members working with hand tools to ferry material through a 6-foot gate. An alternative grinder-only quote was $450 but required an extra trip and did not include hauling the root balls — the homeowner chose extraction to clear the footprint for a shed base.
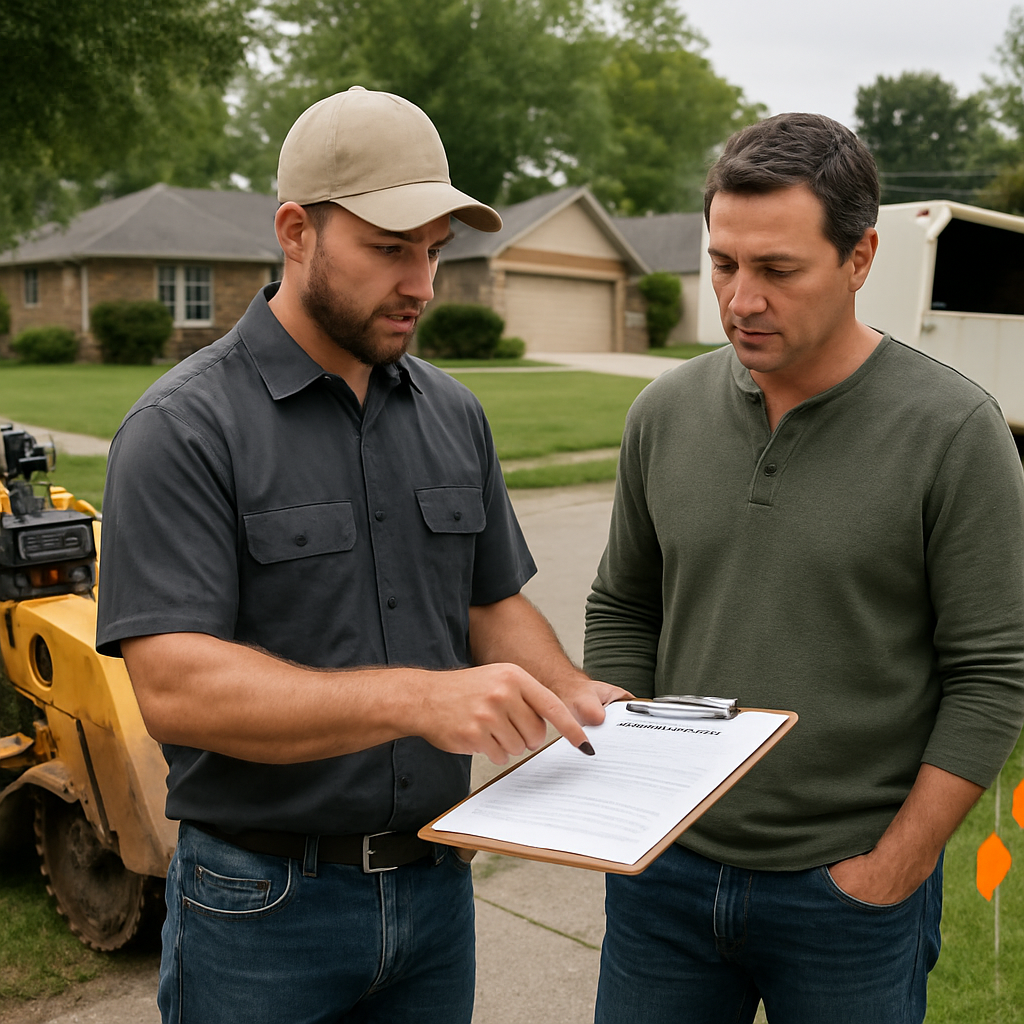
Practical recommendation: get at least two on-site estimates that specify grind depth, disposal, and any restoration. Ask contractors to break out line items so you can compare apples to apples.
How to Prepare Your Yard Before Stump Removal: A Step-by-Step Checklist
Do the prep work and you pay less, get the job done faster, and avoid surprise delays. Contractors price for friction: cluttered yards, hidden utilities, and poor access add time and equipment swaps. A short checklist done ahead of arrival reduces those markups more often than you might expect.
Practical timeline and actions
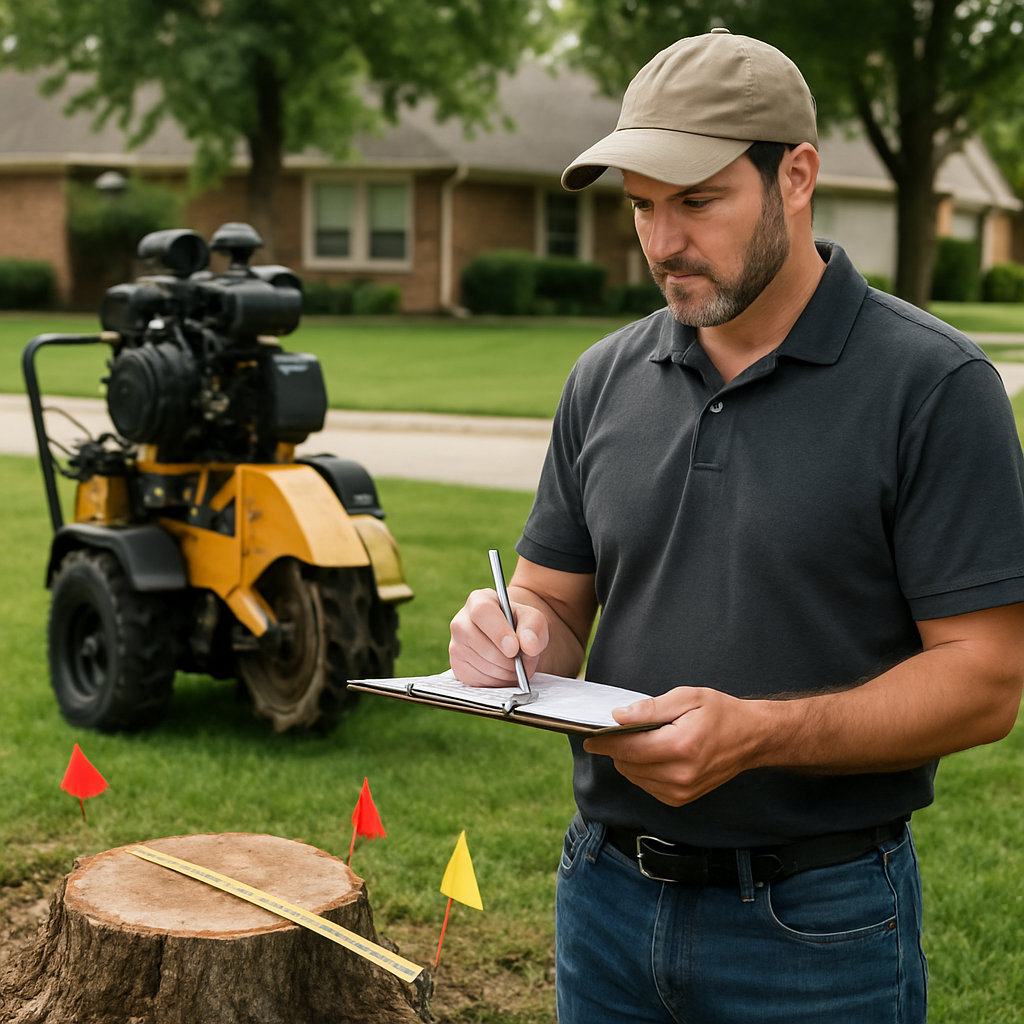
- 7+ days before: Photograph the stump from several angles, measure its diameter, and email the pictures to bidders so they can give a realistic preliminary estimate. Tip: include shots that show gates, driveway width, and any steps.
- 3–5 days before: Arrange for a utility locate through 811. Mark the corners of any buried irrigation heads, septic access, invisible-fence posts, or known conduit with
flaggingor stakes so the crew can see them immediately. - 2–3 days before: Clear a 10–15 foot-wide route from the street or driveway to the work area. Move potted plants, lawn furniture, bikes, and play equipment off-site or to a designated staging area. If parking is tight, reserve a spot for the contractor truck and a separate space for the chip-truck or trailer.
- 1 day before: Trim low branches that would block a tracked grinder or mini-excavator and remove loose debris around the stump. Cut and store any portable irrigation lines but do not dig to expose main utilities yourself.
- Day of service: Keep children and pets away, unlock gates if needed, and provide a single point of contact. If you require a particular grind depth, backfill method, or want grindings left on site, have that in writing and available for the crew to confirm.
Mark sensitive zones with color-coding. Use red flags for electrical or known utilities, blue for irrigation, and yellow for gas if present. This simple visual reduces the time crews spend hunting and lowers the chance of accidental damage.
Practical trade-off to accept: doing prep yourself saves labor charges but not technical tasks. Do not attempt to excavate roots around major utilities or remove concrete anchors — those are tasks for licensed crews. Improper DIY digging is how people end up with unexpected repair bills or delayed permits.
Site-condition judgment: schedule heavy work when the ground is firm. Saturated soil leads to deep ruts and often triggers a higher mobilization fee for track mats or additional crew. Conversely, extremely dry, dusty conditions can increase cleanup time; if your yard is unusually dry, ask the contractor about dust-control options.
Concrete example: A homeowner with a side-yard stump cleared a 6-foot-wide path, flagged an underground sprinkler line, and left a driveway space for the chip-truck. The locating service flagged a shallow electrical run that the homeowner had not known about; because it was marked in advance, the crew used a smaller tracked grinder and completed the job without a second visit. That prework saved the homeowner a same-day change-order.
If you want the lowest overall bill, photograph the site for estimates, have utilities located, and create direct machine access.
Next consideration: before the crew arrives, ask your contractor for a one-line site-prep list and confirm whether they include haul-off and backfill. That single confirmation prevents the common mismatch between what homeowners expect and what the crew plans to leave behind.
Choosing a Contractor: Questions to Ask and Red Flags to Avoid
Hire the plan, not the price. The contractor you pick should be judged on the clarity of their job plan and risk controls — how they will get the stump out, protect utilities and structures, and restore the hole — rather than the lowest dollar on a phone quote.
Essential on-site questions (what to press for)
- Scope and outcome: Exactly what will be removed and to what depth (give diameter and location), and whether grindings will be left, hauled, or used as mulch.
- Equipment and access plan: Which machine will you use (model or class), where it will be staged, and whether alternative methods are needed for tight gates or steps.
- Crew and subcontracting: Who performs the work — company employees or subcontractors — and can they provide crew references for similar residential jobs?
- Insurance and liability: Can they email a certificate of liability and workers compensation that lists your state and shows adequate limits?
- Utilities and safety controls: Will they wait for an official utility locate from the one-call service and how will they protect marked lines during work? See one-call utility locate for more on locating underground utilities.
- Restoration and compaction: How will the crater be backfilled, compacted, and finished; what materials will be used and who is responsible for settling or regrading?
- Change-orders and payment: How do they handle unexpected conditions, and what payment schedule is typical (deposit, progress, completion)?
- Follow-up and guarantees: Do they offer a warranty for resprouts, settling, or damage, and what does that warranty actually cover?
Practical trade-off: A contractor who brings a mid-sized tracked grinder to the site will usually charge more than a crew planning to hand-chip, but you avoid multiple return trips and patchwork fixes. Paying for the right equipment up-front often reduces total cost and risk.
Red flags that mean walk away
- Refuses an on-site inspection and insists a flat phone quote is final.
- Won't show proof of insurance or gives evasive answers about coverage limits.
- Demands cash-only or an unusually large upfront payment with no contract.
- Says they will dig before utilities are located or dismisses buried services as unlikely.
- Uses absolute guarantees such as never resprouting without a clear, written exclusion and process for follow-up.
- No local address, no verifiable references, or an inability to produce before-and-after photos of similar work.
- Offers a suspiciously low price that excludes haul-off, disposal, or restoration — they plan add-on fees after mobilizing.
Judgment call that matters: Credentials matter, but local, hands-on experience with soil types and root behavior is the better predictor of a clean job. An ISA credential is useful; the person who actually brings the grinder and knows how oak roots behave in compact clay is the one you want on site.
Concrete example: A homeowner hired the lowest bidder who refused to show insurance and later left the yard full of grindings without backfill; when the ground settled the following winter, the contractor was unreachable and the homeowner paid a second crew to regrade. By contrast, Mr Tree Inc. provided a written scope naming the grinder model, an itemized haul-off fee, and a post-job compaction step; the job closed with no change-orders and no surprise invoices.
Aftercare, Disposal, and Replanting Options
Immediate reality: what happens after the stump is gone largely determines how quickly you can reuse the spot and whether you avoid a second job. Disposal choice, backfill technique, and a short aftercare plan control settlement, nutrient problems, and resprouting risk.
Disposal choices and trade-offs: You can reuse grindings on-site, haul them to a green-waste facility, or compost them first. Reusing fresh chips as mulch is cheap and keeps material local but risks temporary nitrogen tie-up in adjacent beds and can smother fine turf if applied too thick. Hauling costs more up front but is the safer route when you want to plant immediately or install a lawn or foundation-grade fill.
How to backfill so the ground behaves: Backfill the grind crater in 3 to 4 inch lifts, lightly compact each lift, and finish with screened topsoil. Do not overfill flush to grade and then leave loose; over-compacted fill causes poor drainage and under-compacted fill causes long-term settling. If the contractor offers engineered compacted fill for a build site, take it for any planned heavy structure.
Managing roots, resprouts, and soil health
Resprout reality: grinding removes the trunk and root crown but leaves large roots that can sprout in some species. Watch the spot for 12 months and remove suckers promptly by cutting flush at ground level. For persistent resprouters, a targeted follow-up treatment or mechanical root removal is the practical fix; avoid broad chemical spraying near edible gardens without professional advice.
- Post-job actions: perform a basic soil test before replanting large trees so you know pH and nutrient needs
- Amendment tip: mix aged grindings with compost 50-50 before using in beds; never lay a thick layer of fresh chips directly where you plan to seed or transplant
- Timing rule of thumb: you can lay turf or small shrubs within weeks if backfill is stable; wait 3 to 6 months before planting a specimen tree in the same footprint to avoid settling issues
- Root distance: position a new tree at least as far from the hole as the expected mature canopy radius to reduce future root conflicts
Practical judgment: reusing grindings is fine when you accept a short settling timeline and are willing to mix or age chips first. If your plan is immediate heavy use – a pool, garage pad, or large specimen tree – spend on proper haul-off and engineered backfill up front. That decision saves time and prevents a costly do-over.
Real-world example: A homeowner had several stumps ground and asked to keep the chips. They spread fresh grindings over a future vegetable patch. Within weeks the lettuce and beans were stunted due to nitrogen competition. Mr Tree Inc. removed the chips from the beds, mixed compost into the top 6 inches of soil, and the next planting season produced a normal crop.
Important: if you plan to replant large trees or build in the same spot, insist on a written backfill and waiting schedule in your estimate. For planting guidance from a qualified arborist, see ISA or contact Mr Tree Inc. stump-grinding and stump removal pages for service details.
0 Comments